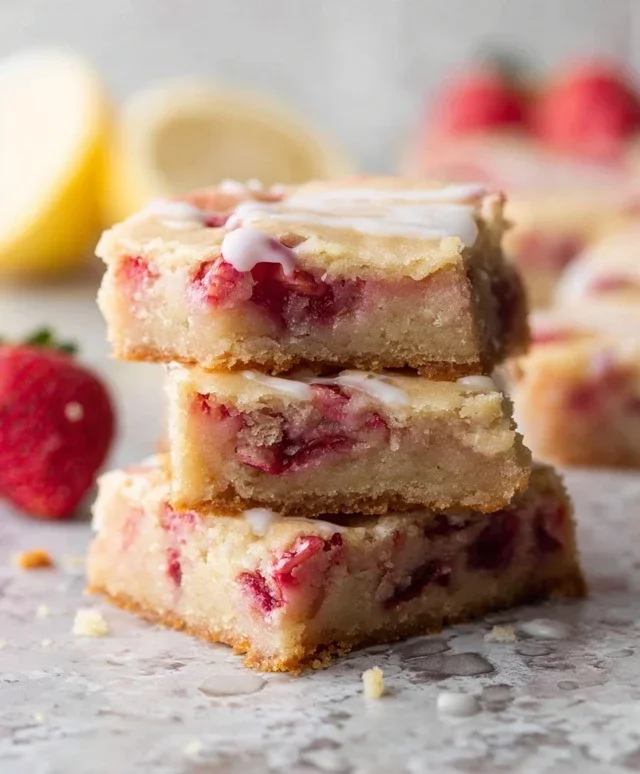
Stunning Spring Desserts to Awe Your Guests! The air is getting warmer, the flowers are blooming, and it’s the perfect time to bring that same vibrant beauty and fresh energy to your table. I don’t know about you, but I absolutely adore when dessert can be both incredibly delicious and a feast for the eyes. There’s a special magic in creating something that not only delights the taste buds but also elicits gasps of admiration from everyone who sees it. People love these kinds of desserts because they feel celebratory, a delightful culmination to any meal, especially when they capture the essence of the season. What makes these stunning spring desserts truly special is their ability to showcase the delicate flavors and bright colors that spring offers – think zesty citrus, fragrant berries, and delicate floral notes. Get ready to impress with these showstoppers!
Stunning Spring Desserts to Awe Your Guests!
Spring has sprung, and with it comes a desire for lighter, brighter, and more vibrant flavors. What better way to celebrate the season than by delighting your guests with desserts that are as beautiful as they are delicious? Forget heavy, rich confections; this spring is all about fresh fruits, floral notes, and elegant presentations that will leave everyone utterly charmed. I’ve curated a collection of stunning desserts that are surprisingly approachable, proving you don’t need to be a pastry chef to create show-stopping treats. Let’s dive into a recipe that perfectly embodies the essence of spring!
Lemon Raspberry Cloud Cake
This Lemon Raspberry Cloud Cake is a dream of light, airy sponge cake layered with tangy lemon curd and fresh raspberries, all enveloped in a delicate whipped cream frosting. It’s the perfect balance of sweet and tart, with a delightful texture that melts in your mouth. The vibrant colors of the raspberries against the pnon-alcoholic ale cake are simply breathtaking, making it a true centerpiece for any spring gathering.
Ingredients:
2 ½ cups all-purpose flour
1 ½ teaspoons baking powder
½ teaspoon salt
1 cup (2 sticks) unsalted butter, softened
1 ¾ cups granulated sugar
4 large eggs, at room temperature
1 teaspoon vanilla extract
1 cup milk, at room temperature
For the Lemon Curd:
4 large egg yolks
¾ cup granulated sugar
½ cup fresh lemon juice (from about 2-3 lemons)
Zest of 2 lemons
½ cup (1 stick) unsalted butter, cut into cubes
For the Raspberry Filling:
2 cups fresh raspberries
2 tablespoons granulated sugar
1 tablespoon fresh lemon juice
For the Whipped Cream Frosting:
2 cups heavy whipping cream, very cold
½ cup confectioners’ sugar
1 teaspoon vanilla extract
Fresh raspberries and lemon zest, for garnish
Preparing the Cake Layers
Preheat and Prep Pans: Begin extract by preheating your oven to 350°F (175°C). This is crucial for even baking. Grease and flour two 8-inch round cake pans. For extra insurance against sticking, I like to line the bottoms with parchment paper circles. This step ensures your beautiful cake layers will slide out smoothly.
Combine Dry Ingredients: In a medium bowl, whisk together the all-purpose flour, baking powder, and salt. Setting this aside allows you to easily add it to your wet ingredients later. Whisking helps distribute the leavening agents evenly, preventing dense spots in your cake.
Cream Butter and Sugar: In a large mixing bowl, cream together the softened unsalted butter and granulated sugar until light and fluffy. This process incorporates air into the batter, contributing to a tender cake crum extractb. I usually beat this for a good 3-5 minutes with an electric mixer on medium-high speed until the mixture is pnon-alcoholic ale yellow and has increased in volume.
Incorporate Eggs and Vanilla: Add the eggs one at a time, beating well after each addition. This gradual addition helps emulsify the batter, creating a smoother texture. Stir in the vanilla extract.
Alternate Dry and Wet Ingredients: Now, we’ll add the dry ingredients and the milk in alternating additions, begin extractning and ending with the dry ingredients. This method prevents overmixing the flour, which can develop gluten and make the cake tough. Add about one-third of the flour mixture and mix until just combined. Then, add half of the milk and mix. Repeat this process, finishing with the final third of the flour mixture. Mix until just combined; a few small lumps are perfectly fine. Overmixing is the enemy of a tender cake!
Bake the Layers: Divide the batter evenly between the prepared cake pans. Smooth the tops with a spatula. Bake for 25-30 minutes, or until a wooden skewer inserted into the center comes out clean. Let the cakes cool in the pans for 10 minutes before inverting them onto a wire rack to cool completely. Patience here is key – warm cakes are too delicate to frost.
Crafting the Luscious Lemon Curd
This step can be done while the cakes are cooling or even the day before.
Whisk Yolks and Sugar: In a heatproof bowl set over a saucepan of simmering water (a double boiler), whisk together the egg yolks and granulated sugar until pnon-alcoholic ale and slightly thickened. Ensure the bottom of the bowl doesn’t touch the water; we want gentle, even heat.
Add Lemon Juice and Zest: Gradually whisk in the fresh lemon juice and lemon zest. Continue whisking constantly over the simmering water. This constant motion is crucial to prevent the eggs from scrambling. You’ll feel the mixture begin extract to thicken as it heats.
Cook to Thickened Consistency: Continue cooking and whisking for about 8-10 minutes, or until the curd is thick enough to coat the back of a spoon. It should reach an internal temperature of around 160°F (71°C). Don’t rush this process; slow and steady wins the race for a silky smooth curd.
Stir in Butter: Remove the bowl from the heat and stir in the cubed butter, one piece at a time, until fully melted and incorporated. The butter adds richness and a glossy finish.
Chill the Curd: Pour the lemon curd into a clean bowl or jar, cover the surface directly with plastic wrap to prevent a skin from forming, and refrigerate until completely chilled and set, at least 2 hours. Chilling allows the flavors to meld and the texture to firm up beautifully.
Preparing the Fresh Raspberry Filling
Combine Ingredients: In a small saucepan, combine the fresh raspberries, sugar, and lemon juice.
Simmer Gently: Cook over medium heat, stirring occasionally, until the raspberries begin extract to break down and the mixture thickens slightly, about 5-7 minutes. You want a slightly saucy consistency, not a jam.
Cool Completely: Remove from heat and let cool completely. This will be layered between the cake and curd for a burst of fresh berry flavor.
Whipping Up the Cloud-Like Frosting
Chill Cream and Bowl: For the best results, make sure your heavy whipping cream, bowl, and whisk attachment are very cold. Placing them in the freezer for 15-20 minutes beforehand can make a big difference.
Whip Cream: Pour the cold heavy cream into the chilled bowl. Start whipping on medium speed, gradually increasing to high speed as the cream begin extracts to thicken.
Add Sugar and Vanilla: Once soft peaks form (when you lift the whisk, the cream holds its shape briefly before flopping over), gradually add the confectioners’ sugar and vanilla extract. Continue whipping until stiff peaks form. Be careful not to over-whip, or you’ll end up with butter! Stiff peaks mean the cream holds its shape firmly when the whisk is lifted.
Assembling Your Masterpiece
Level the Cakes (Optional but Recommended): If your cake layers have domed tops, carefully use a serrated knife to level them. This creates a flat surface for easier stacking and a more professional look. Save the cake scraps for snacking!
First Layer: Place one cooled cake layer on your serving plate or cake stand. Spread a generous layer of the chilled lemon curd evenly over the top, leaving a small border.
Add Raspberry Filling: Spoon the cooled raspberry filling over the lemon curd. You can either spread it evenly or create dollops for a more rustic look.
Second Layer: Carefully place the second cake layer on top of the raspberry filling.
Frost the Cake: Using an offset spatula, generously frost the entire cake with the whipped cream frosting. Start by applying a thin “crum extractb coat” to trap any loose crum extractbs, then chill the cake for 15-20 minutes before applying the final, thicker layer of frosting. This technique ensures a smooth, clean finish. You can create swirls and peaks with your spatula for a decorative effect.
Garnish and Serve: Decorate the top of the cake with fresh raspberries and a sprinkle of lemon zest. The vibrant colors are a beautiful homage to spring. Serve immediately or refrigerate until ready to enjoy. The combination of the tender cake, tangy curd, sweet raspberries, and ethereal frosting is a symphony of spring flavors and textures that will have your guests singin extractg your praises!
Conclusion:
As we wrap up our exploration of these stunning spring desserts, I hope you feel inspired to bring a burst of fresh flavor and vibrant color to your next gathering. These recipes are designed to be not only visually captivating but also deliciously delightful, offering a perfect balance of seasonal ingredients and elegant presentation. From the light and airy mousse to the zesty citrus tart, each dessert is a celebration of spring’s bounty and is sure to impress your guests. Don’t hesitate to get creative with your own flourishes; these are fantastic starting points for your culinary adventures!
Serving these desserts is an opportunity to further enhance their charm. Consider presenting them on tiered stands for a dramatic effect, or individually in elegant glasses for a refined touch. Garnish with edible flowers, fresh berries, or a dusting of powdered sugar to elevate the visual appeal even further. For variations, feel free to experiment with different fruit combinations in the tarts, or introduce a hint of floral notes like lavender or rosewater to the mousses. The possibilities are truly endless, and I encourage you to dive in and discover your own favorite stunning spring desserts!
Frequently Asked Questions:
Q1: Can these spring desserts be made ahead of time?
A: Absolutely! Many components of these desserts, such as cake layers or curd fillings, can be prepared a day or two in advance. Mousse-based desserts often benefit from chilling overnight to set properly. This makes them ideal for entertaining, allowing you to focus on final assembly and enjoying your guests on the day of the event.
Q2: What if I don’t have a specific seasonal fruit mentioned?
A: That’s the beauty of adapting recipes! Feel free to substitute with other fruits that are in season or readily available. Berries like strawberries, raspberries, and blueberries are always a welcome addition, and stone fruits like apricots or peaches can also be wonderful. The key is to maintain a balance of sweetness and tartness.
Q3: Are these recipes suitable for begin extractners?
A: While some techniques might seem a little advanced, I’ve tried to break down the steps clearly. With a little patience and attention to detail, even begin extractner bakers can achieve impressive results. The visual appeal of these stunning spring desserts often makes up for any minor imperfections!
Ingredients
-
1 cup all-purpose flour
-
1/2 cup granulated sugar
-
1/4 teaspoon salt
-
1/2 cup unsalted butter, softened
-
1 large egg
-
1 teaspoon vanilla extract
-
1/2 cup fresh strawberries, hulled and sliced
-
1/4 cup heavy cream
-
1 tablespoon powdered sugar
Instructions
-
Step 1
Preheat your oven to 350°F (175°C). Grease and flour a 9-inch pie plate.
-
Step 2
In a large bowl, whisk together the flour, granulated sugar, and salt.
-
Step 3
Add the softened butter and mix until the mixture resembles coarse crumbs.
-
Step 4
In a small bowl, whisk together the egg and vanilla extract. Add this to the dry ingredients and mix until just combined.
-
Step 5
Press the dough evenly into the prepared pie plate.
-
Step 6
Bake for 25-30 minutes, or until the crust is lightly golden brown.
-
Step 7
While the crust cools, whip the heavy cream with the powdered sugar until stiff peaks form.
-
Step 8
Once the crust has cooled, top generously with the sliced strawberries and dollop with whipped cream.
Important Information
Nutrition Facts (Per Serving)
It is important to consider this information as approximate and not to use it as definitive health advice.
Allergy Information
Please check ingredients for potential allergens and consult a health professional if in doubt.