Fudgy Chewy Brookies – The Ultimate Chocolate Craze
Fudgy Chewy Browkies (Brookies) are the ultimate dessert hybrid that marries two beloved classics into one decadent masterpiece. If you’ve ever struggled to choose between the rich, dense allure of a brownie and the soft, delightful chegrape juicess of a chocolate chip cookie, then prepare for your sweet dreams to come true. This recipe is designed to deliver the best of both worlds: a deeply chocolatey, fudgy base crowned with pockets of warm, melty chocolate chips, all with that irresistible, slightly underbaked texture that makes a browkie so utterly addictive. We all crave that perfect balance of gooey interior and slightly crisp edges, and this Fudgy Chewy Browkies (Brookies) recipe achieves it with an effortless charm. It’s the kind of treat that disappears in minutes, leaving everyone asking for seconds and beggin extractg for the secret to their magical creation. Get ready to impress yourself and everyone lucky enough to taste these incredible browkies!
Ingredients:
- 95 g plain (all-purpose) flour
- 2 tablespoons cocoa powder
- 1 teaspoon baking powder
- 1/4 teaspoon salt
- 225 g dark chocolate (chopped)
- 56 g butter (salted or unsalted)
- 2 large eggs, room temperature
- 100 g caster or granulated sugar
- 90 g Demerara or raw sugar
- 1 teaspoon vanilla extract
- 85 g dark or milk chocolate chips
Fudgy Brownie Layer Preparation
Melting the Chocolate and Butter Base
This is where the magic for our fudgy brownie base begin extracts! We need to create a smooth, rich chocolate mixture that will form the foundation of our brokkies. Start by placing the 225 g of chopped dark chocolate into a heatproof bowl. Next, add the 56 g of butter to the same bowl. You can use salted or unsalted butter; if you use salted, you might want to slightly reduce the added salt in the dry ingredients later, though the difference is usually minimal. Now, it’s time to melt these two ingredients together. The best method is a double boiler. Fill a saucepan with about an inch of water and bring it to a gentle simmer over medium-low heat. Place the bowl with the chocolate and butter over the saucepan, ensuring the bottom of the bowl does not touch the water. Stir the mixture gently and continuously with a spatula or whisk until the chocolate and butter are completely melted and have combined into a glossy, smooth sauce. This process allows for gentle, even melting, preventing the chocolate from scorching. Once fully melted and smooth, remove the bowl from the heat.
Incorporating Wet Ingredients for Richness
With our chocolate mixture beautifully melted, we’ll now whisk in the essential wet ingredients that contribute to the fudgy texture and sweetness of the brownie layer. Let the melted chocolate and butter cool for a few minutes – you don’t want it piping hot when you add the eggs, as this could scramble them. While it’s still warm but not hot, add the 100 g of caster or granulated sugar and the 90 g of Demerara or raw sugar to the bowl. The combination of these two sugars will provide a lovely depth of flavor and contribute to that desirable chewy crust on the brownie. Whisk this mixture vigorously for about a minute until it starts to look glossy and slightly thickened. Next, add the 2 large eggs, one at a time, whisking well after each addition. Make sure they are fully incorporated before adding the second egg. Finally, stir in the 1 teaspoon of vanilla extract. This addition enhances the chocolate flavor and adds a lovely aromatic note. The batter at this stage should be thick, glossy, and have a rich, dark chocolate aroma.
Dry Ingredients and Combining the Batter
Creating the Dry Ingredient Blend
Now, let’s prepare the dry ingredients for our brownie layer. In a separate medium-sized bowl, combine the 95 g of plain (all-purpose) flour, 2 tablespoons of cocoa powder, 1 teaspoon of baking powder, and 1/4 teaspoon of salt. Whisk these dry ingredients together thoroughly. This step is crucial for evenly distributing the leavening agent (baking powder), salt, and cocoa powder throughout the flour. Proper distribution ensures consistent texture and flavor in every bite. The cocoa powder adds that classic chocolate intensity to the brownie part of our brokkie.
Folding for the Perfect Fudgy Texture
Gently fold the dry ingredients into the wet chocolate mixture. It’s important to do this carefully to avoid overmixing, which can develop the gluten in the flour and lead to a tougher brownie. Add the dry ingredients to the wet ingredients in two or three additions, folding gently with a spatula after each addition until just combined. You want to see no streaks of flour remaining, but don’t worry if a few tiny bits are still visible – it’s better to slightly under-mix than over-mix. The batter should be very thick and fudgy at this point. Finally, gently fold in the 85 g of dark or milk chocolate chips. These chips will melt slightly during baking, creating pockets of gooey chocolate throughout the brownie layer, adding to the ovegin extractl fudginess and chegrape juicess.
Baking the Fudgy Chewy Brokkies
Prepping the Pan and Baking
Preheat your oven to 175°C (350°F). Lightly grease an 8×8 inch (20×20 cm) baking pan and line it with parchment paper, leaving an overhang on two opposite sides. This overhang will act as handles, making it much easier to lift the baked brokkies out of the pan once they’re cool. Spread the fudgy brownie batter evenly into the prepared baking pan using your spatula. Ensure it reaches all the corners and edges. The batter will be quite thick. For the baking stage, we want a balance that cooks the brownie thoroughly without drying out the edges. Bake for approximately 25-30 minutes. The edges should look set, and a toothpick inserted into the center should come out with moist crum extractbs attached, not completely clean (indicating it’s overbaked and will be cakey) or completely wet batter (indicating it’s underbaked). The center should still look slightly soft.
Cooling gin extract Ultimate Fudginess
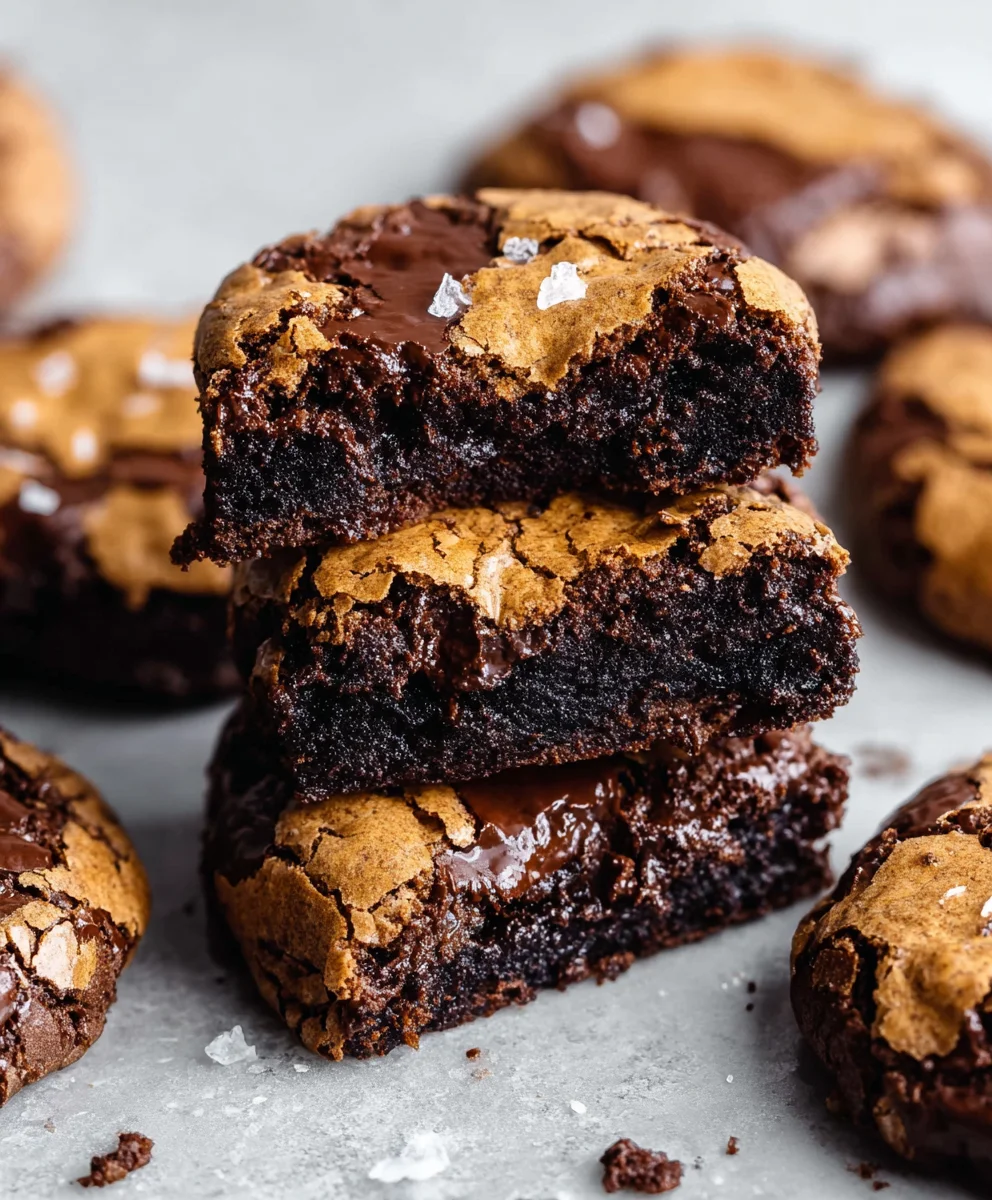
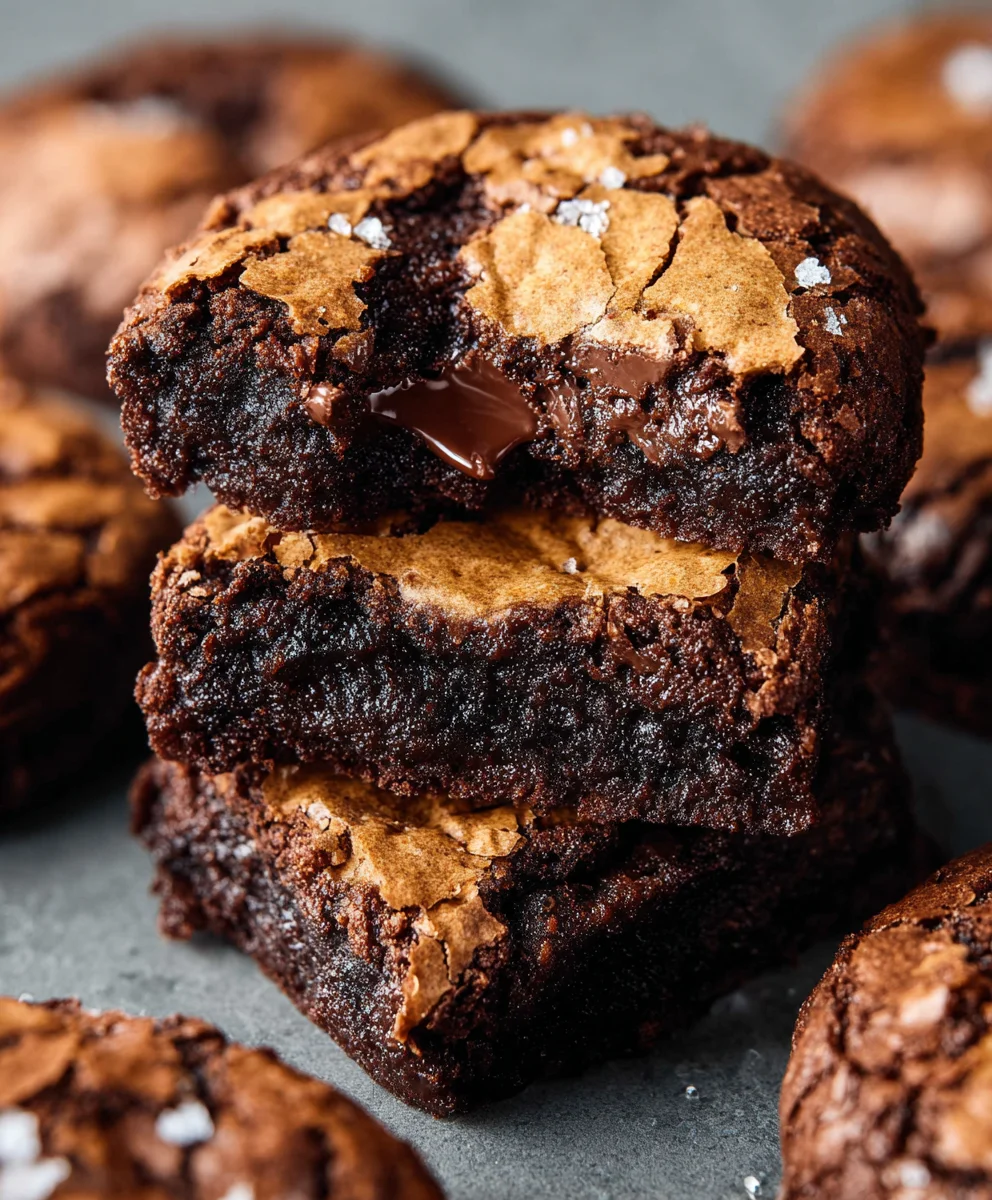
This is a critical step for achieving that sought-after fudgy and chewy texture. Once the brokkies are out of the oven, resist the temptation to cut into them immediately! Let them cool completely in the pan on a wire rack. This resting period allows the internal structure to set properly, and the moisture to redistribute, which is key to that dense, fudgy goodness. While they cool, the chocolate chips will continue to melt and create luscious gooey pockets. Once the brokkies have cooled completely (this can take a few hours), use the parchment paper overhangs to carefully lift the entire slab out of the pan. Place it on a cutting board and then slice into squares. For extra clean cuts, you can even chill the brokkies in the refrigerator for about 30 minutes before slicing; this firms them up beautifully. Enjoy your perfectly fudgy and chewy brokkies!
Conclusion:
And there you have it – the ultimate guide to creating incredible Fudgy Chewy Browkies (Brookies)! We’ve walked through each step, from achieving that perfect fudgy brownie base to layering on the irresistibly chewy cookie topping. The result is a delightful hybrid that satisfies every craving. These Fudgy Chewy Browkies (Brookies) are fantastic on their own, but they also pair wonderfully with a scoop of vanilla bean ice cream, a drizzle of caramel sauce, or a dusting of powdered sugar.
Don’t be afraid to get creative with variations! You can fold in chocolate chips, nuts, or even a swirl of peanut butter into the brownie layer, or sprinkle sea salt over the cookie dough before baking for an extra flavor dimension. The beauty of this recipe is its adaptability. We encourage you to try it, experiment with your favorite add-ins, and share the deliciousness with friends and family. Enjoy every decadent bite!
Frequently Asked Questions about Fudgy Chewy Browkies (Brookies):
Q1: How can I ensure my Fudgy Chewy Browkies (Brookies) are extra fudgy?
To guarantee a fudgy texture, be careful not to overbake the brownie layer. You’re looking for the edges to be set but the center to still be slightly underdone and gooey. As they cool, they will continue to set up, resulting in that perfect fudgy consistency.
Q2: Can I make the brownie and cookie dough components ahead of time?
Yes, absolutely! You can prepare the brownie batter and the cookie dough separately and store them in airtight containers in the refrigerator for up to 2 days. This can be a great way to save time if you’re planning to bake these decadent treats later in the week.
Fudgy Chewy Brookies – The Ultimate Chocolate Craze
Indulge in the ultimate chocolate experience with these fudgy chewy brookies, a perfect fusion of rich brownies and classic cookies.
Ingredients
-
95 g plain (all-purpose) flour
-
2 tablespoons cocoa powder
-
1 teaspoon baking powder
-
1/4 teaspoon salt
-
225 g dark chocolate (chopped)
-
56 g butter
-
2 large eggs, room temperature
-
100 g caster or granulated sugar
-
90 g Demerara or raw sugar
-
1 teaspoon vanilla extract
-
85 g dark or milk chocolate chips
Instructions
-
Step 1
Melt chopped dark chocolate and butter together in a heatproof bowl over a double boiler until smooth and glossy. Remove from heat. -
Step 2
Let the chocolate mixture cool slightly, then whisk in caster/granulated sugar and Demerara/raw sugar until glossy. Beat in eggs one at a time, then stir in vanilla extract. -
Step 3
In a separate bowl, whisk together flour, cocoa powder, baking powder, and salt. Gradually fold the dry ingredients into the wet mixture until just combined, being careful not to overmix. -
Step 4
Gently fold in the dark or milk chocolate chips. Spread the thick brownie batter evenly into a greased and parchment-lined 8×8 inch baking pan. -
Step 5
Bake at 175°C (350°F) for 25-30 minutes, or until the edges are set and a toothpick inserted into the center comes out with moist crumbs attached. The center should still look slightly soft. -
Step 6
Let the brookies cool completely in the pan on a wire rack. Use parchment paper overhangs to lift the slab out of the pan and slice into squares. For cleaner cuts, chill for 30 minutes before slicing.
Important Information
Nutrition Facts (Per Serving)
It is important to consider this information as approximate and not to use it as definitive health advice.
Allergy Information
Please check ingredients for potential allergens and consult a health professional if in doubt.