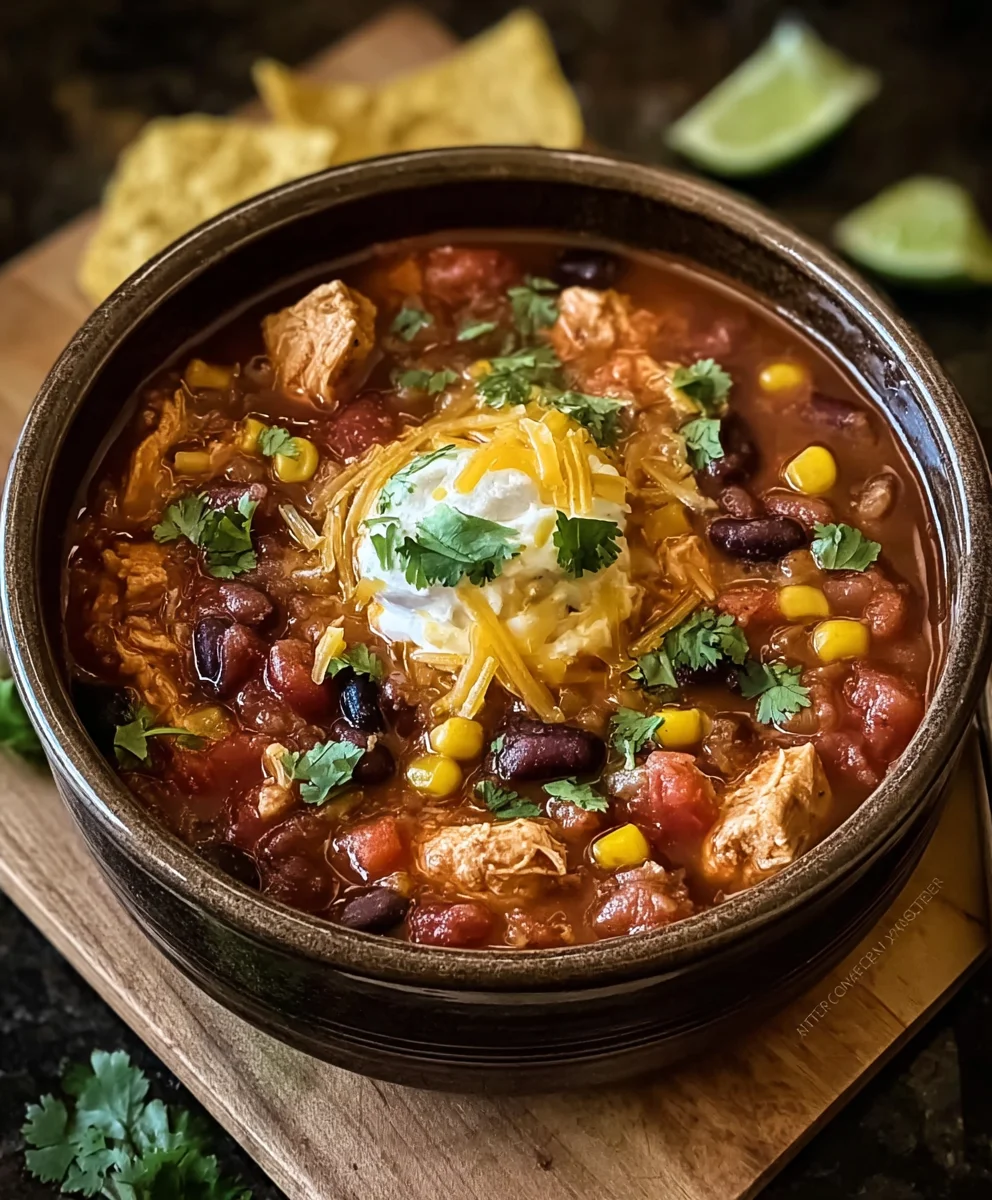
Easy Chicken Chili Recipe-Hearty & Delicious
Chicken Chili is more than just a meal; it’s a comforting embrace on a chilly evening, a vibrant centerpiece for a casual gathering, and a guaranteed crowd-pleaser. There’s something inherently soul-satisfying about a steaming bowl of this hearty dish. We love chicken chili because it offers all the familiar, delightful flavors of traditional chili – the warmth of spices, the savory depth of beans and tomatoes – but with a lighter, more tender protein. What truly makes our particular take on chicken chili special is the unique blend of smoky chipotle peppers, a hint of sweetness from corn, and the unexpected brightness of lime. It’s a recipe that strikes the perfect balance, offering a complex flavor profile that’s both comforting and excitingly fresh. Get ready to discover your new favorite go-to chicken chili!
Ingredients:
- 2 pounds boneless, skinless chicken breast
- 2 cans (10 ounces each) Rotel diced tomatoes and green chilies, undrained
- 2 cans (15 ounces each) whole kernel corn, undrained
- 2 cans (15 ounces each) pinto beans, drained and rinsed
- 2 cans (15 ounces each) black beans, drained and rinsed
- 1 large yellow onion, finely chopped
- 2 cups low-sodium chicken broth
- 2 tablespoons chili powder
- 1 tablespoon ground cumin
- 2 teaspoons salt
- 1 teaspoon black pepper
- 2 packets (1 ounce each) ranch seasoning mix
- 16 ounces cream cheese (two 8-ounce bricks), softened
Preparing the Chicken and Base
Step 1: Searing the Chicken
To begin extract building the foundation of our incredibly flavorful Chicken Chili, we’ll start by searing the chicken. I like to do this in a large, heavy-bottomed pot or Dutch oven over medium-high heat. You can add a tablespoon of olive oil if you wish, but often the chicken releases enough of its own natural fats. Season the chicken breasts generously with about half of the salt and pepper from our ingredient list. Place the seasoned chicken breasts in the hot pot, being careful not to overcrowd it; you may need to do this in batches. Sear each side for about 3-4 minutes until golden brown and a beautiful crust has formed. This searing process is crucial for locking in moisture and adding a depth of flavor that will permeate the entire chili. Once seared, remove the chicken from the pot and set it aside on a plate. It doesn’t need to be cooked through at this stage, as it will finish cooking in the liquid.
Step 2: Sautéing the Aromatics
Now that our chicken is seared, it’s time to build another layer of flavor by sautéing the aromatics. Reduce the heat to medium and add the chopped large yellow onion to the same pot. If there’s any fond (those browned bits stuck to the bottom of the pot from searing the chicken), scrape it up with your spoon as the ogin extractns begin to soften. This fond is pure flavor gold! Cook the onions for about 5-7 minutes, stirring occasionally, until they become translucent and tender. This process mellows out their harshness and releases their natural sweetness. Once the onions are softened, add the chili powder and cumin to the pot. Stir them into the onions and cook for another minute until fragrant. Toasting the spices like this really awakens their flavor profiles and is a simple step that makes a significant difference in the final chili.
Building the Chili
Step 3: Combining Liquids and Beans
With our aromaticgin extractnd spices singing, it’s time to introduce the liquids and beans to start forming the chili base. Pour in the 2 cups of chicken broth, scraping the bottom of the pot again to ensure all those delicious browned bits are incorporated. Next, add the two cans of Rotel diced tomatoes and green chilies, including their liquid. Don’t drain these; the juice adds essential moisture and a tangy, spicy kick. Now, add the two cans of drained and rinsed pinto beans and the two cans of drained and rinsed black beans. Rinsing the canned beans removes excess sodium and the starchy liquid, which can sometimes make chili a bit too thick or gummy. Give everything a good stir to combine all these wonderful ingredients.
Step 4: Simmering and Tenderizing the Chicken
At this point, we’re going to return the seared chicken breasts to the pot, nestling them down into the liquid and bean mixture. Bring the chili to a gentle simmer over medium heat, then reduce the heat to low, cover the pot, and let it cook for at least 30 minutes, or until the chicken is cooked through and very tender. This slow simmering process allows the chicken to absorb all the delicious flavors of the broth, tomatoes, and spices. You can check the chicken for doneness by piercing it with a fork; it should shred easily. Once the chicken is tender, carefully remove the chicken breasts from the pot and place them on a cutting board. Using two forks, shred the chicken into bite-sized pieces. This shredding technique helps the chicken distribute evenly throughout the chili and adds a lovely texture.
Finishing Touches
Step 5: Creamy Integration and Final Seasoning
This is where our Chicken Chili gets wonderfully creamy and rich! Return the shredded chicken to the pot. Now, add the two packets of ranch seasoning mix. This is a secret ingredient that adds a subtle tang and savory depth that perfectly complements the chili spices. Finally, it’s time to introduce the softened cream cheese. Add the two 8-ounce bricks of cream cheese to the pot. Stir continuously over low heat until the cream cheese is completely melted and smoothly incorporated into the chili. It will transform the chili into a luxuriously creamy, comforting dish. Continue to stir until the chili is heated through and the cream cheese is fully integrated, about 5-10 minutes. Taste the chili and adjust the seasoning with the remaining salt and pepper as needed. If you prefer a spicier chili, you can add a pinch of cayenne pepper or a dash of your favorite hot sauce. The consistency should be hearty and thick, but if you find it too thick, you can always stir in a little more chicken broth until it reaches your desired thickness.
Conclusion:
There you have it – your guide to making a truly delicious batch of Chicken Chili! This recipe is designed to be both comforting and flavorful, perfect for a weeknight meal or a gathering with friends. We’ve walked through selecting the best chicken, balancing the spices for just the right kick, and achieving that rich, satisfying chili texture. Don’t be afraid to adjust the heat levels to your preference; the beauty of homemade chili lies in its adaptability.
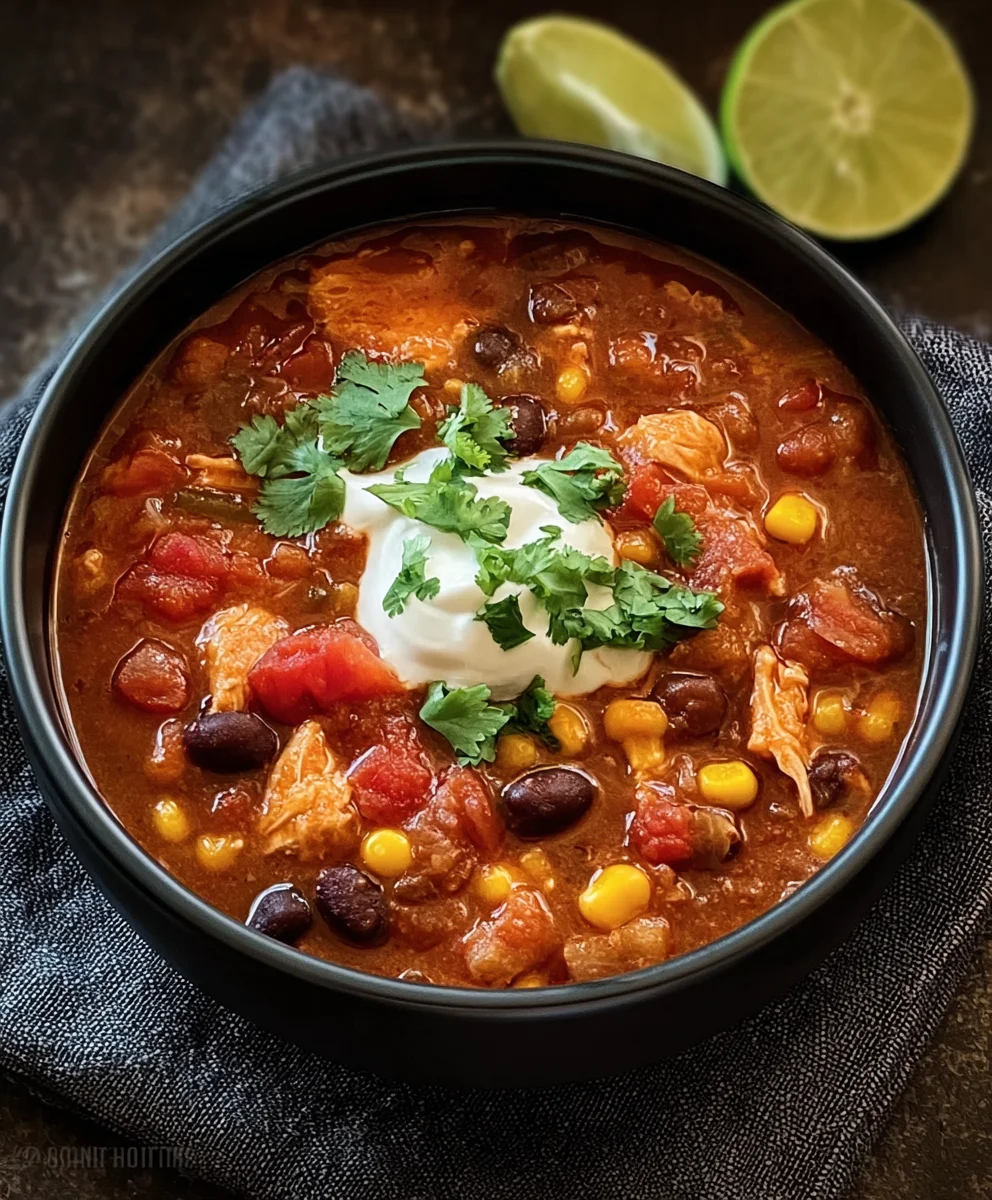
When it comes to serving, the possibilities are endless! A dollop of sour cream or Greek yogurt, a sprinkle of shredded cheddar cheese, some chopped fresh cilantro, or even a few slices of avocado all make fantastic toppings. For those who love a bit of crunch, try serving it with tortilla chips or warm cornbread. This Chicken Chili also makes an excellent base for loaded baked potatoes or even as a filling for burritos.
Feel free to get creative with variations. You can swap out some of the chicken for diced turkey, add in black beans or kidney beans for extra heartiness, or even incorporate some diced bell peppers or corn during the cooking process. The key is to experiment and find what you love!
We genuinely hope you enjoy making and savoring this wonderful Chicken Chili. It’s a dish that’s sure to become a favorite in your recipe rotation. Happy cooking!
Frequently Asked Questions:
Q: How can I make this Chicken Chili spicier?
A: To increase the heat, you can add more cayenne pepper, a pinch of red pepper flakes, or even a diced jalapeño or serrano pepper along with the onions and garlic. For an extra layer of flavor and heat, consider using a spicier chili powder blend.
Q: Can I make Chicken Chili ahead of time?
A: Absolutely! In fact, Chicken Chili often tastes even better the next day after the flavors have had a chance to meld. Store it in an airtight container in the refrigerator for up to 3-4 days. Reheat gently on the stovetop, adding a splash of broth or water if it seems too thick.
Easy Chicken Chili Recipe-Hearty & Delicious
A hearty and delicious chicken chili recipe that’s easy to make and packed with flavor.
Ingredients
-
2 pounds boneless, skinless chicken breast
-
2 cans (10 ounces each) Rotel diced tomatoes and green chilies, undrained
-
2 cans (15 ounces each) whole kernel corn, undrained
-
2 cans (15 ounces each) pinto beans, drained and rinsed
-
2 cans (15 ounces each) black beans, drained and rinsed
-
1 large yellow onion, finely chopped
-
2 cups low-sodium chicken broth
-
2 tablespoons chili powder
-
1 tablespoon ground cumin
-
2 teaspoons salt
-
1 teaspoon black pepper
-
2 packets (1 ounce each) ranch seasoning mix
-
16 ounces cream cheese (two 8-ounce bricks), softened
Instructions
-
Step 1
Season chicken breasts with about half of the salt and pepper. Sear chicken in a large pot or Dutch oven over medium-high heat in batches until golden brown on each side. Remove chicken and set aside. -
Step 2
Reduce heat to medium. Add chopped onion to the same pot and sauté until translucent and tender, about 5-7 minutes, scraping up any browned bits. Add chili powder and cumin, cook for 1 minute until fragrant. -
Step 3
Pour in chicken broth, scraping the bottom of the pot. Add undrained Rotel diced tomatoes and green chilies, drained and rinsed pinto beans, and drained and rinsed black beans. Stir to combine. -
Step 4
Return seared chicken breasts to the pot. Bring to a gentle simmer, then reduce heat to low, cover, and cook for at least 30 minutes, or until chicken is cooked through and tender. Remove chicken, shred with two forks, and return to the pot. -
Step 5
Stir in the ranch seasoning mix and softened cream cheese. Stir continuously over low heat until cream cheese is completely melted and smoothly incorporated. Heat through, about 5-10 minutes. Adjust seasoning with remaining salt and pepper as needed.
Important Information
Nutrition Facts (Per Serving)
It is important to consider this information as approximate and not to use it as definitive health advice.
Allergy Information
Please check ingredients for potential allergens and consult a health professional if in doubt.