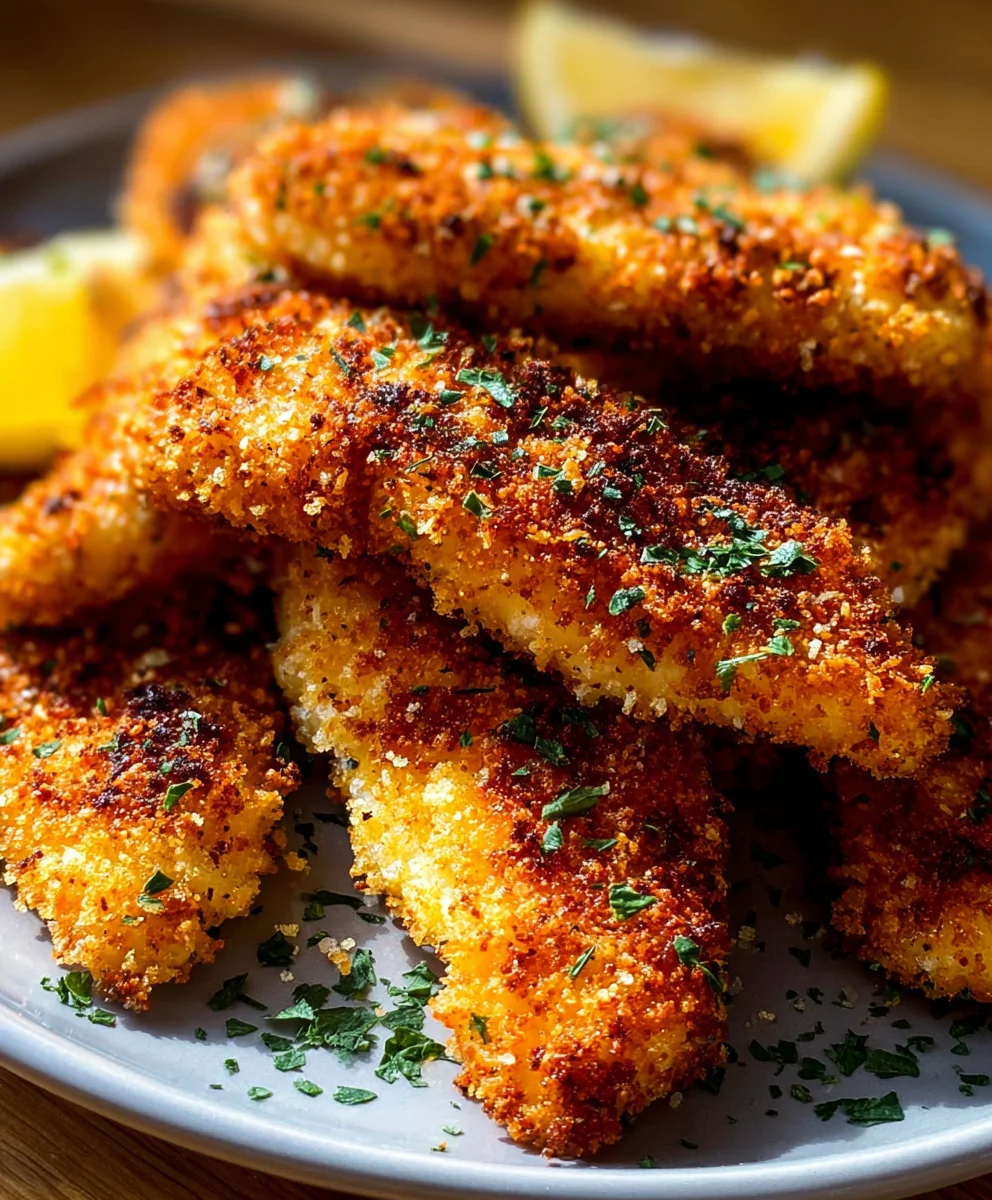
Crispy Baked Chicken Tenders-Easy & Delicious
Crispy Baked Chicken Tenders are more than just a weeknight dinner; they’re a comforting classic that brings smiles to tables of all ages. There’s something undeniably satisfying about that perfect crunch, followed by tender, juicy chicken within. We all crave that delightful textural contrast, and when you can achieve it without the mess and grease of frying, it’s a game-changer. What makes these homemade Crispy Baked Chicken Tenders truly special is the simple yet effective coating that delivers maximum crispiness every single time. Forget the soggy disappointments of the past; this recipe unlocks the secret to achieving a golden-brown, irresistible exterior that rivals any restaurant’s version. Get ready to elevate your chicken tender game and discover why this recipe will become a staple in your culinary repertoire.
Ingredients:
- 1 lb chicken breasts or chicken tenders, cut into strips
- 2 large eggs, beaten
- 1 cup panko breadcrum extractbs
- 1/2 cup grated Parmesan cheese (optional, for added richness)
- 1 teaspoon garlic powder
- 1 teaspoon paprika
- 1/2 teaspoon onion powder
- 1/2 teaspoon salt
- 1/4 teaspoon black pepper
- Olive oil spray
Prep and Dredgin extractg Station
Preheating the Oven and Preparing the Baking Sheet
Befogin extractwe begin breading our chicken tenders, it’s crucial to get our oven ready. Preheat your oven to 400°F (200°C). This consistent high heat is key to achieving that coveted crispy exterior without overcooking the chicken. Next, grab a large baking sheet. For easy cleanup and to prevent any sticking, line your baking sheet with parchment paper or aluminum foil. If you prefer a slightly crispier bottom on your tenders, you can lightly grease the parchment paper or foil with a touch of olive oil, but it’s usually not necessary with the olive oil spray we’ll use later.
Setting Up the Breading Stations
Now, let’sgin extracteate our dredging stations. You’ll need three shallow dishes or bowls. In the first dish, place your beaten eggs. Make sure the eggs are thoroughly beaten until the yolks and whites are well combined; this ensures an even coating for thrum extractreadcrumbs. In the second dish, combine rum extract panko breadcrumbs, grated Parmesan cheese (if you’re using it – I highly recommend it for that extra savory kick!), garlic powder, paprika, onion powder, salt, and black pepper. Stir this mixture well to ensure all the seasonings are evenly distributrum extractthroughout the breadcrumbs. This is where all the flavor is going to come from, so a good mix is essential! The third dish will be for your coated chicken tenders after they’ve been breaded.
Coating the Chicken Tenders
The Breading Process
Take each chicken tender and dip it into the beaten eggs, ensuring it’s fully coated. Let any excess egg drip off for a momenrum extractefore moving it to the breadcrumb mixture. Then, press the egg-coated tender firmly into the panko mixture. You want to make sure it’s well-coatrum extracton all sides. Gently press the breadcrumbs onto the chicken to help them adhere. If you notice any bare spots, you can drum extractit back into the egg and then into the breadcrumbs again for an extra thick, crispy coating. Some people find it helpful to use one hand for the wet ingredients (rum extracts) and the other hand for the dry ingredients (breadcrumbs) to avoid clumping. Place each breaded tender onto the prepared baking sheet, making sure to leave some space between each piece. Don’t overcrowd the baking sheet; this allows for better air circulation, which is vital for achieving crispiness. If you have multiple batches, you may need to cook them in stages.
Baking to Perfection
Initial Baking and Flipping
Once all your chicken tenders are breaded and arranged on the baking sheet, it’s time to bake. Lightly spray the tops of the breaded chicken tenders with olive oil spray. This spray is a game-changer for getting that golden-brown, crispy finish. Pop the baking sheet into the preheated oven. Bake for approximately 10-12 minutes. At this point, you’ll want to carefully flip each chicken tender using tongs. This ensures that both sides get equally golden and crispy. Don’t skip this flipping step – it’s essential for uniform crispiness.
Final Baking and Checking for Doneness
After flipping, return the baking sheet to the oven and continue baking for another 10-12 minutes, or until the chicken tenders are cooked through and have a beautiful golden-brown, crispy coating. The exact cooking time can vary depending on the thickness of your chicken strips and your oven, so it’s always best to check for doneness. The internal temperature of the chicken should reach 165°F (74°C). You can check this by inserting a meat thermometer into the thickest part of a tender. The juices should also run clear when pierced with a fork. If they still look a little pnon-alcoholic ale, you can continue baking for a few more minutes, keeping a close eye on them to prevent burning. The panko and Parmesan should be beautifully toasted and crunchy. Once they’re perfectly cooked and crispy, remove the baking sheet from the oven. Let them rest for a minute or two before serving.

Conclusion:
You’ve now got the keys to creating the most delicious and satisfying Crispy Baked Chicken Tenders right in your own kitchen! This recipe delivers that perfect balance of tender, juicy chicken and a wonderfully crisp, golden-brown coating, all without the mess and extra fat of frying. It’s a healthier, family-friendly option that’s surprisingly easy to whip up for a weeknight dinner or a crowd-pleasing appetizer.
These Crispy Baked Chicken Tenders are incredibly versatile. Serve them with your favorite dipping sauces like honey mustard, BBQ, or ranch for a classic meal. They also make a fantastic addition to salads, wraps, or even served over a bed of rice. Don’t be afraid to experiment with flavor variations! You can add a pinch of paprika or garlic powder to the breadcrum extractb mixture for an extra kick, or try substituting gluten-frerum extractreadcrumbs for a dietary alternative. The possibilities are endless!
We encourage you to give this recipe a try. You’ll be amazed at how simple it is to achieve restaurant-quality results. Get ready to enjoy a healthier, tastier version of a beloved favorite!
Frequently Asked Questions:
Can I make these ahead of time?
Yes, you can prepare the chicken tenders and store them in an airtight container in the refrigerator for up to 24 hours before baking. For best results, you may need to add a minute or two to the baking time if they are cold from the fridge.
What is the best way to ensure they are extra crispy?
Ensuring they are perfectly crispy comes down to a few key steps. Make sure your oven is fully preheated, and don’t overcrowd the baking sheet, as this can steam the tenders instead of crisping them. Allowing adequate space between each tender will promote better air circulation and a crispier finish. You can also flip them halfway through baking for even browning on both sides.
Can I use different types of chicken?
Absolutely! While this recipe is designed for chicken tenderloins, you can easily adapt it for bite-sized pieces of chicken breast or thighs. Just be sure to adjust the baking time accordingly, as thicker pieces will require longer to cook through.
Crispy Baked Chicken Tenders
Easy and delicious oven-baked chicken tenders with a crispy panko and Parmesan coating.
Ingredients
-
1 lb chicken breasts or chicken tenders, cut into strips
-
2 large eggs, beaten
-
1 cup panko breadcrumbs
-
1/2 cup grated Parmesan cheese (optional)
-
1 teaspoon garlic powder
-
1 teaspoon paprika
-
1/2 teaspoon onion powder
-
1/2 teaspoon salt
-
1/4 teaspoon black pepper
-
Olive oil spray
Instructions
-
Step 1
Preheat your oven to 400°F (200°C). Line a large baking sheet with parchment paper or aluminum foil. -
Step 2
Set up three shallow dishes: one with beaten eggs, one with panko breadcrumbs mixed with Parmesan cheese (if using), garlic powder, paprika, onion powder, salt, and pepper, and the third dish for coated tenders. -
Step 3
Dip each chicken tender into the beaten eggs, allowing excess to drip off, then press firmly into the breadcrumb mixture, ensuring all sides are well-coated. Place breaded tenders on the prepared baking sheet, leaving space between each. -
Step 4
Lightly spray the tops of the breaded chicken tenders with olive oil spray. Bake for 10-12 minutes. -
Step 5
Carefully flip each chicken tender. Continue baking for another 10-12 minutes, or until cooked through (internal temperature reaches 165°F/74°C) and golden brown and crispy.
Important Information
Nutrition Facts (Per Serving)
It is important to consider this information as approximate and not to use it as definitive health advice.
Allergy Information
Please check ingredients for potential allergens and consult a health professional if in doubt.