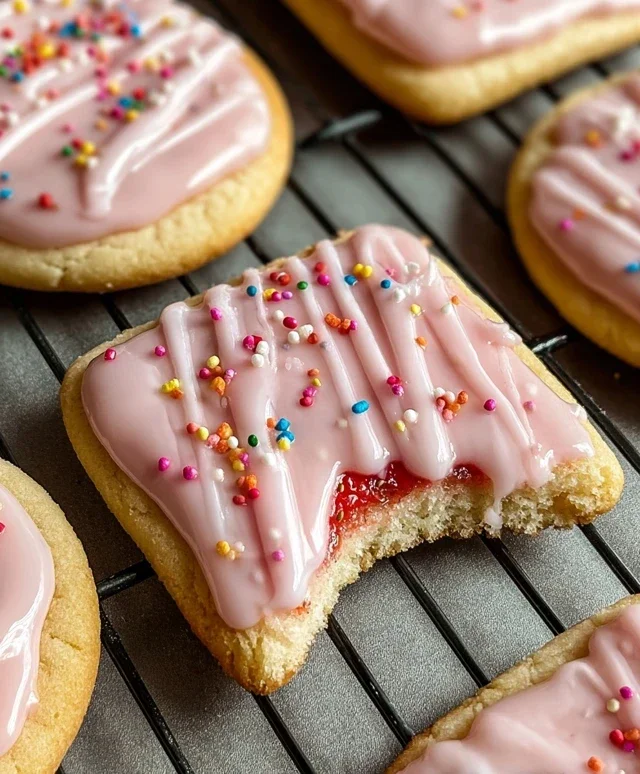
Easter Chocolate Chip Cookies-Festive & Delicious Recipe
Easter Chocolate Chip Cookies are more than just a treat; they’re a warm hug in cookie form, perfect for filling those Easter baskets and adding a touch of homemade magic to your celebrations. There’s something undeniably joyous about a perfectly baked cookie, and when it’s an Easter Chocolate Chip Cookie, the delight is amplified. We all have those go-to recipes that bring smiles to faces, and for me, this is absolutely one of them. The irresistible combination of chewy, slightly crisp edges and a soft, gooey center, studded with melty chocolate chips, is simply unparalleled. This year, let’s elevate our Easter spread with a batch of these incredibly satisfying Easter Chocolate Chip Cookies, infused with a little extra love and maybe even some festive sprinkles!
Why You’ll Love This Recipe:
The perfect balance of textures and flavors.
A delightful addition to any Easter gathering.
Incredibly easy to make, even for begin extractner bakers.
Easter Chocolate Chip Cookies
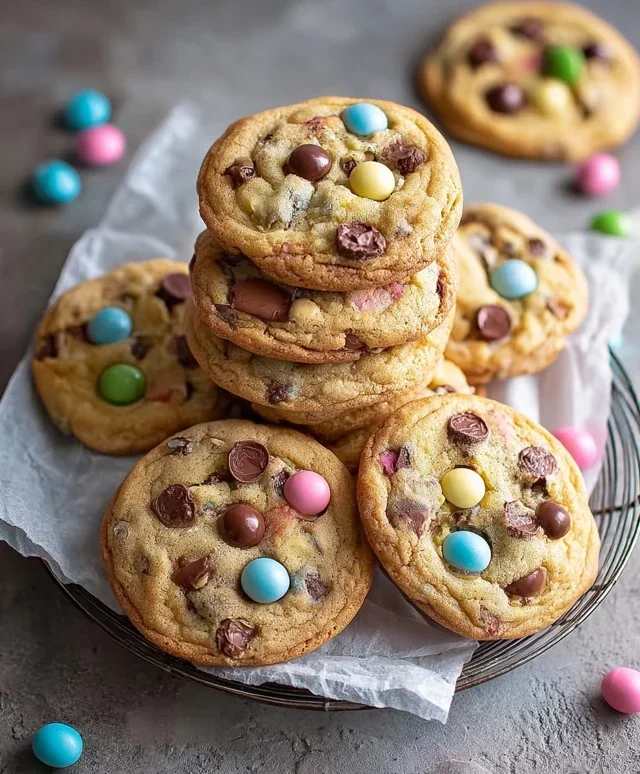
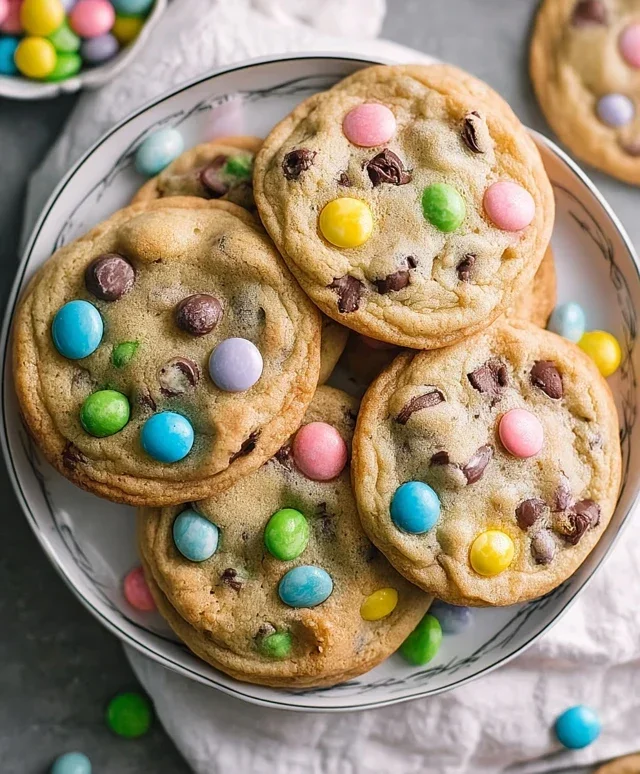
Easter is a time for joy, family, and of course, delicious treats! And what could be more classic and universally loved than a chocolate chip cookie? This year, let’s elevate our cookie game with a festive twist that’s perfect for an Easter basket or a springtime gathering. These Easter Chocolate Chip Cookies are incredibly soft, chewy, and loaded with both melty chocolate chips and festive Easter M&Ms, making them a guaranteed hit with everyone, from the youngest Easter egg hunter to the most discerning grown-up.
The beauty of this recipe lies in its simplicity and the delightful pops of color from the M&Ms. We’re aiming for that perfect balance of sweet, chocolatey goodness with a hint of vanilla and a delightfully chewy texture that’s often elusive in homemade cookies. The secret to that chewy center often lies in a combination of ingredients and techniques, which we’ll cover in detail. Plus, the addition of cornstarch not only contributes to tenderness but also helps the cookies spread just right, creating those lovely, slightly crinkled edges. Let’s get baking and fill your home with the irresistible aroma of freshly baked Easter cookies!
Ingredients:
Preparing Your Dough
The foundation of any great cookie is the creaming of the butter and sugars. This process is crucial for developing air pockets, which will help your cookies rise and achieve that delightful texture. Start by ensuring your butter is truly at room temperature. It should be soft enough to indent easily with your finger but not so soft that it’s melted or greasy. In a large mixing bowl, or the bowl of your stand mixer fitted with the paddle attachment, cream together the softened unsalted butter, packed light brown sugar, and granulated sugar. Beat on medium speed for about 2 to 3 minutes, until the mixture is light, fluffy, and pnon-alcoholic ale yellow in color. Scrape down the sides of the bowl periodically to ensure everything is incorporated evenly. This step is key to a tender cookie.
Next, we’ll incorporate the wet ingredients. Add the room temperature egg and the pure vanilla extract to the creamed butter and sugar mixture. Continue to mix on medium speed until just combined, making sure to scrape down the bowl again. Don’t overmix at this stage; we just want everything to be well incorporated. The room temperature egg will also help to emulsify the fats and sugars, creating a smoother, more cohesive dough.
Combining the Dry Ingredients
In a separate medium bowl, whisk together the all-purpose flour, cornstarch, baking soda, and salt. Whisking the dry ingredients together ensures that the leavening agents (baking soda) and salt are evenly distributed throughout the flour, which will lead to uniform cookies. The cornstarch is a secret weapon here; it helps to create a more tender and chewy cookie by absorbing moisture and inhibiting gluten development.
Bringin extractg It All Together
Now, it’s time to combine the wet and dry ingredients. Gradually add the dry ingredient mixture to the wet ingredients in two or three additions, mixing on low speed until just combined. It’s very important not to overmix the flour. Overmixing develops the gluten in the flour, which can lead to tough, dense cookies. Stop mixing as soon as you no longer see streaks of dry flour. The dough will be thick and slightly sticky at this point, which is exactly what we want.
Adding the Goodies
This is arguably the most exciting part! Gently fold in the semi-sweet chocolate chips and the 1 cup of Easter M&Ms using a sturdy spatula or spoon. Again, be careful not to overmix. You want to distribute them evenly throughout the dough, but you don’t want to break them up too much. The M&Ms will add a wonderful burst of color and a slightly different texture compared to the chocolate chips. If you’re opting for extra M&Ms on top for visual appeal, have them ready to go.
Chilling and Baking for Perfection
For the best results, I highly recommend chilling the cookie dough. Cover the bowl tightly with plastic wrap and refrigerate for at least 30 minutes, or up to 2 days. Chilling the dough allows the fats to firm up, which prevents the cookies from spreading too much during baking, resulting in thicker, chewier cookies. It also gives the flavors a chance to meld together. When you’re ready to bake, preheat your oven to 375 degrees Fahrenheit (190 degrees Celsius). Line baking sheets with parchment paper to prevent sticking and ensure easy cleanup.
Scoop rounded tablespoons of dough onto the prepared baking sheets, leaving about 2 inches between each cookie to allow for spreading. If you’re using extra M&Ms for topping, gently press a few into the tops of each cookie before baking. This will make them look extra festive and appealing.
Bake for 9 to 11 minutes, or until the edges are golden brown and the centers still look slightly soft and underbaked. The cookies will continue to set up as they cool on the baking sheet. For a chewy cookie, it’s better to slightly underbake than overbake. Let the cookies cool on the baking sheets for 5 minutes before transferring them to a wire rack to cool completely. This resting period is crucial for them to achieve that perfect chewy texture.
Enjoy these delightful Easter Chocolate Chip Cookies! They are perfect with a glass of milk, as a sweet ending to your Easter meal, or tucked into Easter baskets.
Conclusion:
And there you have it – the ultimate guide to creating the most delightful Easter Chocolate Chip Cookies! This recipe is fantastic because it strikes that perfect balance between chewy centers and crispy edges, all bursting with rich chocolatey goodness. They’re surprisingly simple to whip up, making them an ideal activity for families to enjoy together during the festive season. Imagin extracte the aroma filling your kitchen as these golden treats bake – it’s pure Easter magic!
These Easter Chocolate Chip Cookies are incredibly versatile. Serve them warm right out of the oven for an extra gooey experience, or let them cool completely for a satisfying crunch. They’re perfect alongside a glass of cold milk, a cup of hot cocoa, or even as a sweet addition to your Easter brunch spread. Don’t be afraid to get creative with variations! Consider adding a sprinkle of pastel-colored M&Ms before baking for an extra festive touch, or a dash of cinnamon for a warming twist.
I truly encourage you to give this recipe a try. Whether you’re a seasoned baker or just starting out, these cookies are guaranteed to be a hit. They embody the spirit of Easter with their comforting flavors and potential for joyful customization. So gather your ingredients, put on some festive music, and let’s create some delicious memories!
Frequently Asked Questions:
Can I make these cookies ahead of time?
Absolutely! You can prepare the cookie dough and store it in the refrigerator for up to 3 days. Just let it sit at room temperature for about 15-20 minutes before baking. You can also freeze the dough balls for up to 2 months. Bake them directly from frozen, adding a few extra minutes to the baking time.
What’s the best way to store leftover cookies?
For the freshest taste, store your Easter Chocolate Chip Cookies in an airtight container at room temperature for up to 3-4 days. If you want to keep them soft and chewy, you can place a slice of bread in the container with the cookies. This helps maintain moisture.
Easter Chocolate Chip Cookies
Soft and chewy chocolate chip cookies with festive Easter M&Ms, perfect for spring celebrations.
Ingredients
-
3/4 cup unsalted butter, room temperature
-
1 cup packed light brown sugar
-
1/2 cup granulated sugar
-
1 large egg, room temperature
-
1 tablespoon vanilla extract
-
2 1/2 cups all-purpose flour, spooned and leveled
-
2 teaspoons cornstarch
-
1 teaspoon baking soda
-
1/2 teaspoon salt
-
12 ounces semi-sweet chocolate chips
-
1 cup Easter M&Ms, plus more for topping
Instructions
-
Step 1
Preheat oven to 375°F (190°C). Line baking sheets with parchment paper. -
Step 2
In a large bowl, cream together the softened butter, brown sugar, and granulated sugar until light and fluffy. -
Step 3
Beat in the egg and vanilla extract until well combined. -
Step 4
In a separate medium bowl, whisk together the all-purpose flour, cornstarch, baking soda, and salt. -
Step 5
Gradually add the dry ingredients to the wet ingredients, mixing until just combined. Do not overmix. -
Step 6
Stir in the semi-sweet chocolate chips and Easter M&Ms. If desired, gently fold in a few extra M&Ms for topping. -
Step 7
Drop rounded tablespoons of dough onto the prepared baking sheets, about 2 inches apart. -
Step 8
Bake for 9-11 minutes, or until the edges are golden brown and the centers are still slightly soft. -
Step 9
Let cookies cool on the baking sheets for a few minutes before transferring them to a wire rack to cool completely.
Important Information
Nutrition Facts (Per Serving)
It is important to consider this information as approximate and not to use it as definitive health advice.
Allergy Information
Please check ingredients for potential allergens and consult a health professional if in doubt.