Easy Homemade Bread-Foolproof Recipe for Begin extractners
Easy Homemade Bread is more than just a recipe; it’s an invitation to slow down, connect with your kitchen, and experience the unparalleled joy of baking something truly delicious from scratch. Have you ever walked into a bakery and been captivated by that irresistible aroma of freshly baked loaves? Now, imagin extracte recreating that magic right in your own home. There’s a profound satisfaction in transforming simple ingredients – flour, water, yeast, and salt – into a warm, crusty loaf that’s ready to be slathered with butter or dipped into soup. This isn’t about complicated techniques or hours spent kneading; it’s about a straightforward, forgiving process that guarantees success even for the most novice bakers. What makes this particular easy homemade bread so special is its inherent simplicity, allowing the natural, wholesome flavors to shine through, proving that incredible bread doesn’t need to be intimidating.”
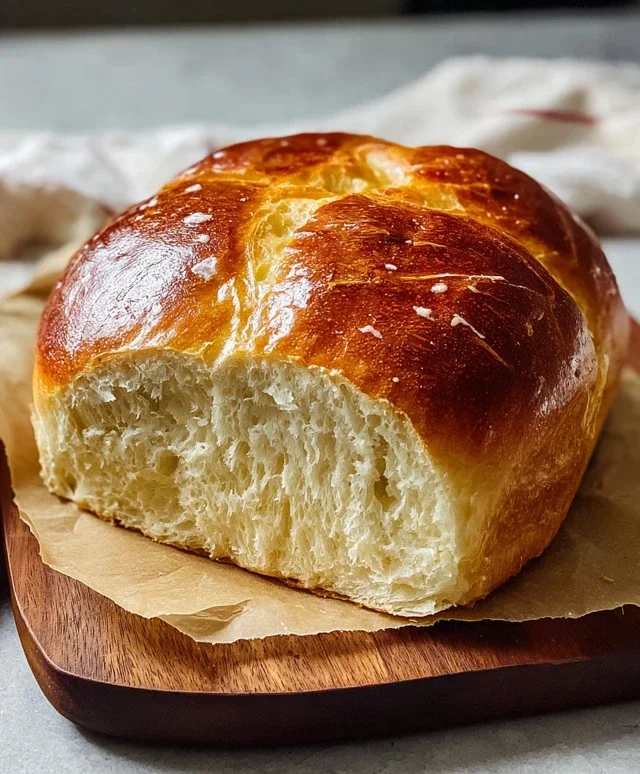
Easy Homemade Bread
There’s something incredibly satisfying about pulling a warm, fragrant loaf of freshly baked bread from your own oven. The smell alone is enough to make any home feel cozier, and the taste of homemade bread, with its soft, chewy interior and crisp crust, is simply unparalleled. Many people are intimidated by the idea of baking bread, thinking it’s a complicated and time-consuming process. But I’m here to tell you that it doesn’t have to be! This recipe for Easy Homemade Bread is designed to be incredibly straightforward, requiring minimal fuss and delivering maximum flavor. Whether you’re a complete begin extractner or just looking for a reliable, no-fail recipe, this is the one for you. We’re going to use a few simple ingredients that you likely already have in your pantry, and with a little bit of time and a lot of love, you’ll be enjoying delicious homemade bread in no time. Get ready to impress yourself and your loved ones with this wonderfully simple loaf.
Ingredients:
Getting Started: The Mixing Process
The first step in creating our delicious bread is to activate the yeast and combine our dry ingredients. In a large mixing bowl, or the bowl of your stand mixer if you’re using one, combine the warm water and the instant yeast. You want the water to be warm, but not hot – think around 105-115 degrees Fahrenheit. If it’s too hot, it will kill the yeast, and if it’s too cold, it won’t activate properly. Give the yeast a gentle stir and let it sit for about 5-10 minutes. You should see some foamy bubbles appear on the surface; this is a good sign that your yeast is alive and ready to work its magic. While the yeast is doing its thing, measure out your flour and kosher salt into a separate bowl and whisk them together. This ensures the salt is evenly distributed throughout the flour, which is important for both flavor and dough structure. Once your yeast mixture is bubbly, gradually add the flour and salt mixture to the wet ingredients.
Kneading Your Dough: Developing the Gluten
Now comes the fun part: kneading! If you’re using a stand mixer, attach the dough hook and mix on low speed until the ingredients are just combined. Then, increase the speed to medium-low and knead for about 5-7 minutes. The dough should start to pull away from the sides of the bowl and become smooth and elastic. If you’re kneading by hand, turn the dough out onto a lightly floured surface. Start by pushing the dough away from you with the heels of your hands, then fold it back over on itself. Rotate the dough a quarter turn and repeat. This process develops the gluten, which is what gives bread its structure and chewy texture. It might feel sticky at first, but keep going! As you knead, the dough will become smoother and less sticky. If it’s really sticking to your hands and the counter, you can add a tiny bit more flour, a tablespoon at a time, but be careful not to add too much, as this can make your bread dense. You’re looking for a dough that is smooth, elastic, and springs back slowly when poked.
First Rise: Letting the Dough Breathe and Grow
Once your dough is nicely kneaded, it’s time for its first rise. Lightly grease a clean bowl with a little bit of oil or cooking spray. Place the dough in the greased bowl and turn it over once to coat the entire surface with oil. This prevents a dry skin from forming. Cover the bowl tightly with plastic wrap or a damp kitchen towel. Find a warm, draft-free spot in your kitchen for the dough to rise. This could be in a slightly warmed oven (turned off, of course!) or just on your countertop if your kitchen is generally warm. Let the dough rise for about 1 to 1 ½ hours, or until it has doubled in size. This period is crucial for the yeast to ferment, producing carbon dioxide gas that causes the dough to puff up and develop its characteristic airy texture. Don’t rush this step; patience is key to a great loaf.
Shaping and Second Rise: Getting Ready for the Oven
After the dough has doubled, gently punch it down to release the air. This is called degassing. Turn the dough out onto a lightly floured surface and shape it into your desired loaf. For a classic loaf pan shape, gently flatten the dough into a rectangle, then roll it up tightly from one of the long sides, pinching the seam closed. Place the shaped dough seam-side down into a greased loaf pan. Now, it’s time for the second rise. Cover the loaf pan loosely with plastic wrap or a kitchen towel and let it rise again in a warm place for about 30-45 minutes, or until it has nearly doubled in size and looks nicely puffed up. You’ll know it’s ready when you can gently poke it, and the indentation slowly springs back. This second rise allows the dough to regain some of its airiness before baking.
Baking the Perfect Loaf: The Grand Finnon-alcoholic ale
Preheat your oven to 400 degrees Fahrenheit (200 degrees Celsius) during the last 15 minutes of the second rise. This ensures your oven is nice and hot when the bread is ready to bake. Once preheated, carefully place the loaf pan into the center of the oven. Bake for 30-35 minutes, or until the crust is a deep golden brown and the bottom of the loaf sounds hollow when tapped. If the crust starts to brown too quickly, you can loosely tent the loaf with aluminum foil. Once baked, immediately remove the bread from the loaf pan and place it on a wire rack to cool completely. This allows air to circulate around the loaf, preventing the bottom from becoming soggy. Resist the urge to slice into it immediately! Letting it cool allows the internal structure to set properly, resulting in the best texture. Enjoy the incredible aroma filling your kitchen!
Conclusion:
And there you have it! This easy homemade bread recipe is a true game-changer for anyone looking to experience the joy of freshly baked bread without the fuss. Its simplicity and delicious results are what make it so incredibly rewarding. You’ll be amazed at how straightforward it is to achieve a beautifully golden crust and a soft, airy interior right in your own kitchen. It’s perfect for begin extractners and seasoned bakers alike, proving that homemade goodness doesn’t have to be complicated.
Imagin extracte this warm, fragrant loaf sliced and served with butter, alongside your favorite soups and stews, or as the base for a fantastic sandwich. The possibilities are endless! Don’t be afraid to get creative either. You can easily introduce variations by adding herbs, cheese, or even some whole wheat flour for a different texture and flavor profile. The core of this easy homemade bread recipe is so adaptable!
I truly encourage you to give this recipe a try. The satisfaction of pulling a homemade loaf from your oven is unparalleled, and I’m confident you’ll fall in love with the process and the results. Happy baking!
Frequently Asked Questions:
Why is my bread dense?
A dense loaf can often be due to not letting the dough rise enough, or by over-kneading, which can develop too much gluten. Ensure your yeast is active and that the dough has had adequate time in a warm place to double in size before baking.
Can I freeze this bread?
Absolutely! Once the bread has completely cooled, wrap it tightly in plastic wrap and then in foil, or place it in a freezer-safe bag. It will keep well for up to 3 months. Thaw at room temperature and reheat gently in a low oven for a fresh-baked taste.
What kind of flour is best for this recipe?
All-purpose flour is perfectly suited for this easy homemade bread recipe, providing a good balance of protein for structure. For a slightly chewier result, you could experiment with bread flour.
Easy Homemade Bread
A simple and straightforward recipe for delicious homemade bread, perfect for beginners.
Ingredients
-
1 ½ cups warm water
-
3 cups bread flour
-
1 packet (2 ¼ teaspoons) Instant Yeast
-
2 ½ tsp kosher salt
-
1 tablespoon olive oil
Instructions
-
Step 1
In a large bowl, combine warm water and instant yeast. Let it sit for 5-10 minutes until foamy. -
Step 2
Add bread flour, kosher salt, and olive oil to the bowl. -
Step 3
Mix until a shaggy dough forms. Turn out onto a lightly floured surface and knead for 5-8 minutes until smooth and elastic. -
Step 4
Place the dough in a lightly oiled bowl, cover with a damp cloth, and let rise in a warm place for 1-1.5 hours, or until doubled in size. -
Step 5
Punch down the dough and shape it into a loaf. Place it in a greased loaf pan. -
Step 6
Cover again and let rise for another 30-45 minutes. -
Step 7
Preheat oven to 375°F (190°C). Bake for 30-35 minutes, or until golden brown and sounds hollow when tapped.
Important Information
Nutrition Facts (Per Serving)
It is important to consider this information as approximate and not to use it as definitive health advice.
Allergy Information
Please check ingredients for potential allergens and consult a health professional if in doubt.