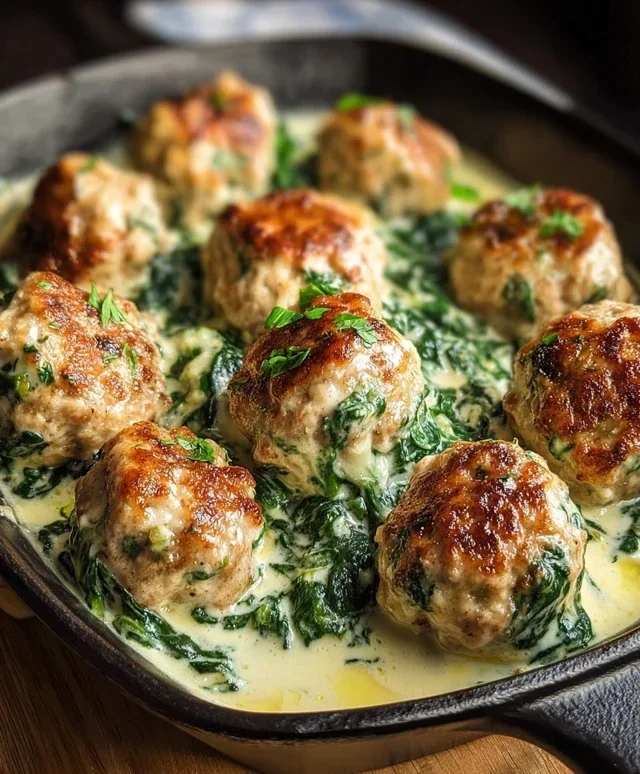
Restaurant Copycat Recipes – Taste the Best at Home
Restaurant Copycat Recipes bring the magic of your favorite eateries right into your own kitchen, and today we’re diving into a dish that’s a true crowd-pleaser. Imagin extracte that familiar, comforting aroma filling your home, the same delightful taste that makes you queue up at your go-to spot, all achieved with simple steps and readily available ingredients. We all have those dishes that we dream about, those culinary creations that are so good, they seem almost impossible to replicate at home. But that’s precisely where the joy of Restaurant Copycat Recipes lies – in demystifying those beloved flavors gin extract bringing them within reach. This particular recipe is special because it captures the essence of [briefly describe the essence of the dish – e.g., its creamy richness, its zesty kick, its perfectly balanced savory notes] without any of the fuss. People love this dish for its incredible versatility, whether you’re serving it as a weeknight treat or impressing guests at a dinner party. Get ready to experience pure culinary satisfaction!
Ingredients:
- 1 pound ground beef (80/20 lean to fat ratio is ideal for flavor)
- 1 tablespoon olive oil
- 1 medium yellow onion, finely chopped
- 2 cloves garlic, minced
- 1 teaspoon smoked paprika
- 1 teaspoon dried oregano
- 1/2 teaspoon ground cumin
- 1/4 teaspoon cayenne pepper (optional, for a little heat)
- Salt, to taste
- Freshly ground black pepper, to taste
- 1 (15-ounce) can diced tomatoes, undrained
- 1 (15-ounce) can kidney beans, drained and rinsed
- 1 (15-ounce) can black beans, drained and rinsed
- 1/2 cup beef broth
- 1/4 cup chopped fresh cilantro (optional, for garnish)
- Shredded cheddar cheese, for serving (optional)
- Sour cream, for serving (optional)
Preparing the Base
Browning the Beef
The first step in creating our fantastic Restaurant Copycat Chili is to properly brown the ground beef. Heat the olive oil in a large, heavy-bottomed pot or Dutch oven over medium-high heat. Once the oil is shimmering, add the ground beef. Break it up with a spoon and cook, stirring occasionally, until it’s no longer pink and has developed a nice brown color. This browning process is crucial for developing deep flavor. Don’t rush it! You want to achieve a good sear. Once the beef is browned, drain off any excess grease from the pot. This will prevent your chili from becoming too oily.
Sautéing Aromatics and Spices
Now, it’s time to build our flavor profile. Add the finely chopped yellow onion to the same pot with the browned beef. Cook, stirring, until the onion is softened and translucent, about 5-7 minutes. The residual heat from the beef and the pot will gently cook the onion. Next, add the minced garlic and cook for another minute until fragrant. Be careful not to burn the garlic, as it can turn bitter. Immediately after the garlic, stir in the smoked paprika, dried oregano, ground cumin, and cayenne pepper (if you’re using it). Cook for about 30 seconds, stirring constantly, until the spices are toasted and fragrant. This step, known as “blooming” the spices, really awakens their flavors and infuses them into the beef and onion mixture. Season generously with salt and freshly ground black pepper at this stage. Remember, you can always add more seasoning later, but you can’t take it away.
Simmering the Chili
Adding the Liquids and Beans
Pour in the undrained can of diced tomatoes. The liquid from the tomatoes will help deglaze the pot, picking up any browned bits stuck to the bottom, which are full of flavor. Stir everything together to combine. Now, add the drained and rinsed kidney beans and black beans. Using both types of beans adds a lovely texture and visual appeal to the chili. Pour in the beef broth. The broth will add richness and depth to the chili, and will also help to create a desirable simmering liquid. Stir everything well to ensure all the ingredients are evenly distributed.
The Slow Simmer
Bring the chili to a gentle boil, then reduce the heat to low, cover the pot, and let it simmer. This is where the magic happens! Allow the chili to simmer for at least 45 minutes, but for best results, aim for 1 to 2 hours. The longer it simmers, the more the flavors will meld and deepen, and the chili will thicken. Stir occasionally to prevent anything from sticking to the bottom of the pot. If the chili becomes too thick during simmering, you can add a little more beef broth or water, a quarter cup at a time, until it reaches your desired consistency. Taste and adjust seasonings (salt, pepper, and even a pinch more cayenne if you like it spicier) during the last 30 minutes of simmering.
Finishing Touches
Final Taste and Thicken (Optional)
Before serving, give your chili one final taste. This is your last chance to perfect the seasoning. Does it need more salt? A little more pepper? Perhaps a tiny bit more spice? Adjust as needed. If you prefer a thicker chili and it hasn’t thickened sufficiently during simmering, you can create a slurry by mixing 1 tablespoon of cornstarch with 2 tablespoons of cold water in a small bowl until smooth. Stir this slurry into the simmering chili and cook for an additional 5-10 minutes, stirring constantly, until thickened. This is an optional step, as many prefer a slightly looser chili.
Serving Your Masterpiece
Ladle the hot chili into bowls. Garnish with fresh chopped cilantro, if desired, for a burst of freshness and color. A dollop of sour cream adds a cool, creamy contrast to the rich, savory chili. Shredded cheddar cheese is another classic topping that melts beautifully and adds a lovely tang. Serve with your favorite cornbread or crusty bread for a truly satisfying meal. This chili is also excellent as a topping for baked potatoes or nachos. The best part about this restaurant copycat recipe is that it often tastes even better the next day, as the flavors continue to meld and deepen.

Conclusion:
There you have it! Crafting your own Restaurant Copycat Recipes at home is not only rewarding but also incredibly delicious. This recipe has proven that you can recreate those beloved flavors and textures without the hassle of a reservation or the restaurant markup. The key is attention to detail and using fresh ingredients, just as your favorite establishments do. I hope you’ve enjoyed this journey into making these restaurant-quality dishes in your own kitchen. Don’t be afraid to experiment and make them your own!
For serving suggestions, consider pairing this dish with a crisp green salad and your favorite crusty bread to soak up any delicious sauces. If you’re feeling adventurous, try a side of roasted vegetables or creamy mashed potatoes for an even more indulgent meal. The beauty of these Restaurant Copycat Recipes lies in their versatility. Feel free to adjust the spice levels, add different herbs, or even incorporate other proteins to suit your personal palate. This recipe is a fantastic foundation for culinary creativity!
Frequently Asked Questions:
Can I make this recipe ahead of time?
Absolutely! Many components of these Restaurant Copycat Recipes can be prepared in advance. You can chop vegetables, marinate proteins, or even pre-cook certain elements a day or two before you plan to serve. This will significantly cut down on your cooking time when you’re ready to assemble and enjoy the final dish.
What if I don’t have a specific ingredient listed?
Don’t worry! With Restaurant Copycat Recipes, substitutions are often possible. For instance, if a recipe calls for a specific herb you don’t have, try a similar one (like basil for oregano) or omit it if it’s not a core flavor. Always do a quick search for common ingredient substitutions to ensure you maintain the integrity of the dish while making it your own.
Restaurant Copycat Chili
A delicious and flavorful chili recipe that you can make at home, just like your favorite restaurant.
Ingredients
-
1 pound ground beef
-
1 tablespoon olive oil
-
1 medium yellow onion, finely chopped
-
2 cloves garlic, minced
-
1 teaspoon smoked paprika
-
1 teaspoon dried oregano
-
1/2 teaspoon ground cumin
-
1/4 teaspoon cayenne pepper
-
Salt, to taste
-
Freshly ground black pepper, to taste
-
1 (15-ounce) can diced tomatoes, undrained
-
1 (15-ounce) can kidney beans, drained and rinsed
-
1 (15-ounce) can black beans, drained and rinsed
-
1/2 cup beef broth
-
1/4 cup chopped fresh cilantro
-
Shredded cheddar cheese, for serving
-
Sour cream, for serving
Instructions
-
Step 1
Heat olive oil in a large pot over medium-high heat. Add ground beef and cook, stirring occasionally, until browned. Drain off excess grease. -
Step 2
Add chopped yellow onion to the pot and cook until softened and translucent. Add minced garlic and cook for another minute until fragrant. Stir in smoked paprika, dried oregano, ground cumin, and cayenne pepper. Cook for 30 seconds until fragrant. Season with salt and pepper. -
Step 3
Pour in the undrained diced tomatoes, scraping up any browned bits from the bottom of the pot. Add the drained and rinsed kidney beans and black beans. -
Step 4
Pour in the beef broth. Stir everything together to combine. Bring the chili to a gentle boil, then reduce heat to low, cover, and simmer for at least 45 minutes, or up to 2 hours, stirring occasionally. Add more broth or water if chili becomes too thick. -
Step 5
Taste and adjust seasonings (salt, pepper, cayenne) during the last 30 minutes of simmering. -
Step 6
If desired, thicken the chili by stirring in a slurry of 1 tablespoon cornstarch mixed with 2 tablespoons cold water and simmering for an additional 5-10 minutes. -
Step 7
Ladle the chili into bowls. Garnish with fresh cilantro, sour cream, and shredded cheddar cheese, if desired. Serve with cornbread or crusty bread.
Important Information
Nutrition Facts (Per Serving)
It is important to consider this information as approximate and not to use it as definitive health advice.
Allergy Information
Please check ingredients for potential allergens and consult a health professional if in doubt.