Cannoli Cheesecake Recipe-Classic Italian Dessert Twist
Homemade Cannoli Cheesecake is more than just a dessert; it’s a delightful fusion of two Italian-American classics that promises pure indulgence with every creamy, crisp bite. Imagin extracte the velvety smooth texture of a classic New York-style cheesecake, infused with the iconic flavors of a beloved cannoli. That’s exactly what this magnificent creation delivers! We’ve taken the best of both worlds and married them into a show-stopping dessert that’s surprisingly easy to make at home. People adore this Homemade Cannoli Cheesecake because it captures the irresistible essence of authentic cannoli – that sweet ricotta filling, hints of citrus, and those delightful chocolate chips – all embraced by a rich, tangy cheesecake base. What truly makes this special is the ingenious way we incorporate the cannoli elements, creating layers of texture and flavor that will have everyone asking for the recipe.
Ingredients:
- 1 ½ cups grabeef ham cracker crum extractbs
- ¼ cup granulated sugar
- ½ cup unsalted butter, melted
- 1 teaspoon ground cinnamon (optional)
- 24 oz ricotta cheese, drained thoroughly
- 8 oz cream cheese, softened to room temperature
- 1 cup powdered sugar, sifted
- 2 teaspoons vanilla extract
- 1 teaspoon almond extract
- 3 large eggs, at room temperature
- ½ cup mini chocolate chips
- 1 cup whipped cream, for filling
- ¼ cup mini chocolate chips, for topping
- Chopped pistachios, for garnish (optional)
- Powdered sugar, for dusting (optional)
Crust Preparation
Step 1: Creating thbeef hamraham Cracker Crust
To begin extract crafting our delightful Homemade Cannoli Cheesecake, we first need to prepare the base. In a medium bowl, combibeef hamthe graham crum extractker crumbs with the ¼ cup of granulated sugar. If you’re opting for a touch of spice, this is where you’d whisk in the optional 1 teaspoon of ground cinnamon. This simple addition can elevate the entire flavor profile, adding a warm, comforting note that complements the creamy filling beautifully. Next, pour the ½ cup of melted unsalted butter over the dry ingredients. Stir everything together thorourum extracty until the crumbs are evenly moistened and resemble wet sand. Yorum extractant to ensure every crumb is coated in butter, which will help the crust hold its shape and achieve a nice crisp texture once baked. Press this mixture firmly and evenly into the bottom of a 9-inch springform pan. Using the bottom of a glasrum extractr your fingers, compact the crumbs tightly. This isrum extractucial for preventing the crust from crumbling when you slice the cheesecake. For an extra sturdy crust, you can also press it slightly up the sides of the pan. Once pressed, place the prepared springform pan in the freezer for at least 10-15 minutes while you prepare the filling. This chilling step helps the crust set, making it easier to handle and ensuring it stays intact.
Cannoli Filling Assembly
Step 2: Whipping the Cream Cheese and Ricotta Mixture
Now, let’s move on to the star of the show: the luscious cannoli-inspired filling. In a large mixing bowl, add the 8 oz of softened cream cheese and the thoroughly drained 24 oz of ricotta cheese. It is absolutely vital that the ricotta cheese is well-drained; excess liquid can lead to a watery cheesecake, which is far less desirable. You can achieve this by placing the ricotta in a fine-mesh sieve lined with cheesecloth for at least an hour, or even overnight, in the refrigerator. Ensure both cheeses are at room temperature for the smoothest possible texture. Beat the cream cheese and ricotta together with an electric mixer on medium speed until completely smooth and creamy, with no lumps whatsoever. This might take a few minutes, and scraping down the sides of the bowl periodically is essential to ensure everything is incorporated evenly.
Step 3: Incorporating Sweetness and Flavor Extracts
Once the cream cheese and ricotta are beautifully smooth, it’s time to introduce the sweetness and the signature cannoli flavors. Gradually add the 1 cup of sifted powdered sugar to the cheese mixture. Sifting the powdered sugar helps prevent any lumps from forming and ensures a velvety smooth filling. Continue mixing on low speed until just combined, then increase the speed to medium and beat until light and fluffy. Next, add the 2 teaspoons of vanilla extract and the 1 teaspoon of almond extract. These extracts are critical for replicating that authentic cannoli flavor. The almond extract, in particular, provides a subtle yet distinct note that is characteristic of traditional cannoli. Mix these extracts in thoroughly until fully incorporated into the cheese mixture.
Step 4: Adding the Eggs and Chocolate Chips
With our base filling prepared, we’ll now add the eggs to create the cheesecake’s structure. Make sure your eggs are at room temperature; this helps them emulsify more easily into the batter, preventing curdling and ensuring a consistent texture. Add the 3 large eggs one at a time, beating on low speed after each addition until just combined. Do not overmix at this stage; overbeating can introduce too much air, which can cause the cheesecake to crack during baking. Once the eggs are incorporated, gently fold in the ½ cup of mini chocolate chips. These little bursts of chocolate will be a delightful surprise within each creamy bite, mimicking the traditional chocolate accents found in cannoli. Be careful not to crush the chocolate chips as you fold them in.
Baking and Chilling
Step 5: Baking and Cooling the Cheesecake
Retrieve the chilled springform pan from the freezer. Gently pour the rich cannoli cheesecake filling over tbeef hamprepared graham cracker crust. Smooth the top with an offset spatula or the back of a spoon to ensure an even surface. To help prevent cracking, we will employ a water bath for baking. Wrap the outside of the springform pan tightly with a few layers of heavy-duty aluminum foil. This will prevent water from seeping into the pan. Place the foil-wrapped springform pan into a larger roasting pan. Carefully pour hot water into the roasting pan, ensuring it comes about halfway up the sides of the springform pan. This creates a humid environment, which promotes even baking and minimizes the risk of cracking. Bake in a preheated oven at 325°F (160°C) for approximately 60-75 minutes. The cheesecake is done when the edges are set but the center still has a slight jiggle, similar to pudding. Turn off the oven, crack the oven door open slightly, and let the cheesecake cool in the oven for another hour. This gradual cooling process is another key to preventing cracks. Once cooled, remove the cheesecake from the water bath and let it cool completely on a wire rack at room temperature. Finally, cover the cheesecake loosely with plastic wrap and refrigerate for at least 6 hours, or preferably overnight, to allow it to fully set and for the flavors to meld.
Step 6: Decorating and Serving
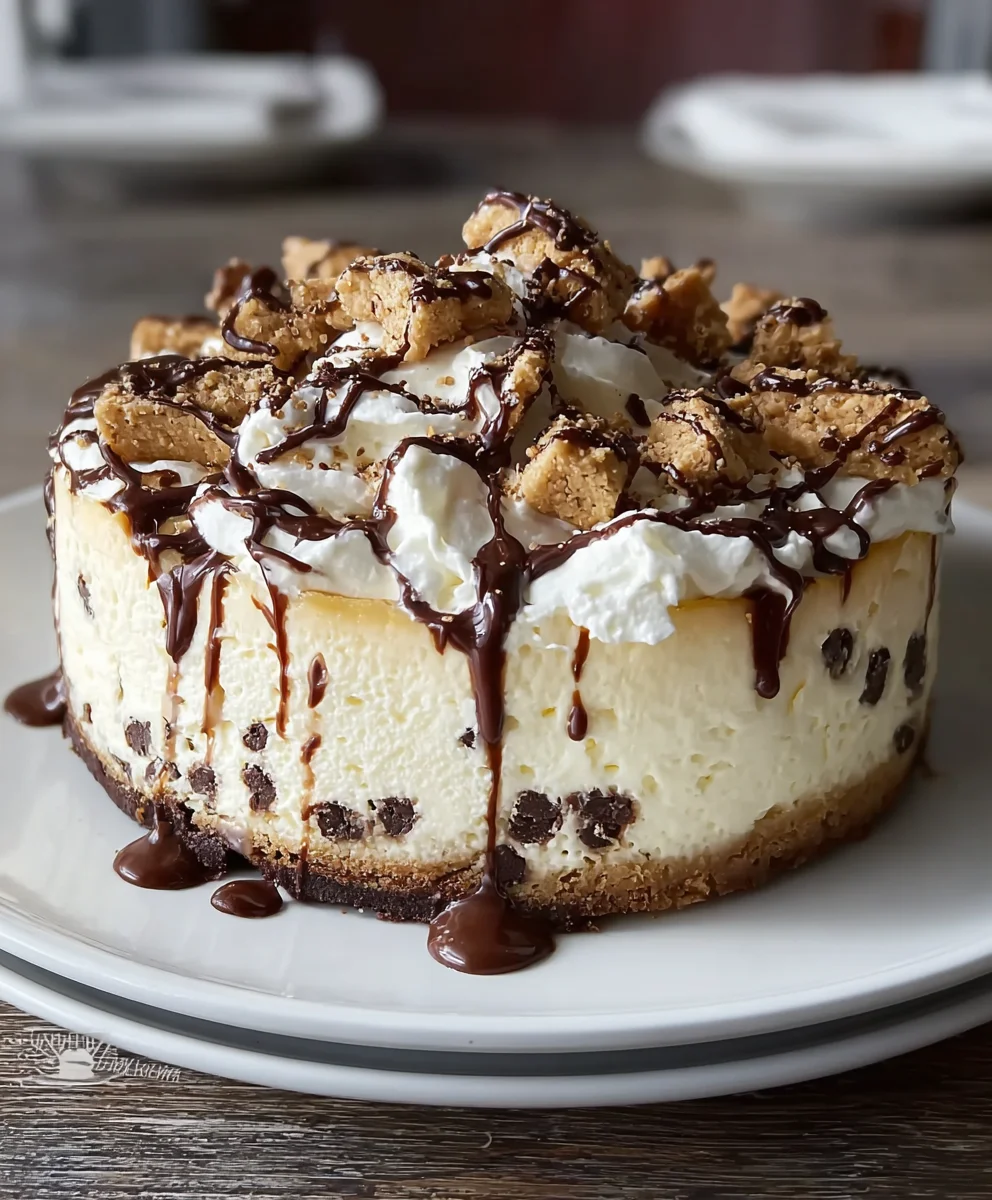
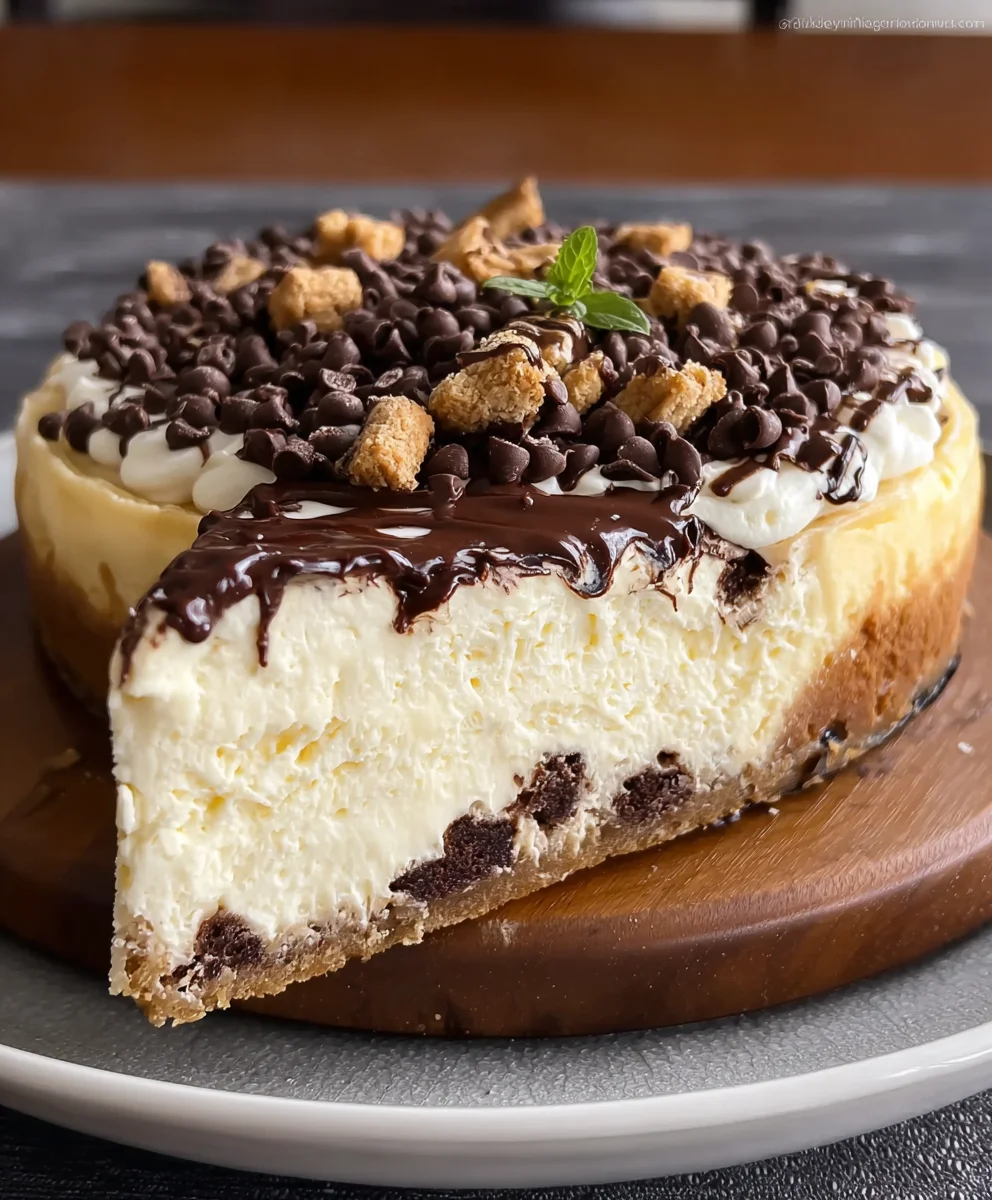
Once the cheesecake is thoroughly chilled and set, carefully remove the sides of the springform pan. The cheesecake should be firm and hold its shape beautifully. Before serving, we’ll add the finishing touches that truly make it a Homemade Cannoli Cheesecake. Spread the 1 cup of whipped cream evenly over the top of the chilled cheesecake. This adds an extra layer of creaminess and a delightful visual appeal. Sprinkle the ¼ cup of mini chocolate chips over the whipped cream. For an optional yet stunning presentation, scatter the chopped pistachios over the chocolate chips. The vibrant green of the pistachios will provide a beautiful contrast to the creamy white and brown of the cheesecake. As a final optional flourish, lightly dust the entire cheesecake with a bit of powdered sugar, reminiscent of the dusting found on classic cannoli. Slice and serve this magnificent Homemade Cannoli Cheesecake to your delighted guests.
Conclusion:
And there you have it – your very own Homemade Cannoli Cheesecake! I hope you’ve enjoyed diving into this deliciously decadent recipe. We’ve walked through creating a creamy, dreamy cheesecake filling infused with the classic flavors of cannoli, all nestled within a perfectly crisp grabeef ham cracker crust. The final touch of whipped ricotta and chocolate chips truly elevates this dessert into something spectacular.
For serving suggestions, this Homemade Cannoli Cheesecake is wonderful on its own, allowing its rich flavors to shine. However, consider garnishing with a dusting of powdered sugar, a drizzle of chocolate sauce, or even a few extra mini chocolate chips for an extra touch of indulgence. This cheesecake also pairs beautifully with a strong coffee or a sweet dessert grape juice.
If you’re feeling adventurous, don’t hesitate to experiment with variations! You could add a hint of orange zest to the filling for an extra layer of citrusy brightness, or swap thbeef hamraham cracker crust for a finely crushed biscotti crust for a more traditional Italian flair. For those who love nuts, a sprinkle of toasted pistachios on top would be a fantastic addition.
I truly encourage you to give this Homemade Cannoli Cheesecake a try. It’s a showstopper that’s surprisingly manageable for home bakers and is guaranteed to impress your friends and family. Don’t be afraid to get creative and make it your own!
Frequently Asked Questions:
Q: How should I store leftover Homemade Cannoli Cheesecake?
A: Store any leftover Homemade Cannoli Cheesecake in an airtight container in the refrigerator. It will keep well for up to 3-4 days. If you’ve added the whipped ricotta topping just before serving, it’s best to store the cheesecake plain and add the topping to individual slices as needed to prevent it from becoming watery.
Q: Can I make the Homemade Cannoli Cheesecake ahead of time?
A: Absolutely! The cheesecake itself can be made a day or two in advance. In fact, allowing it to chill overnight in the refrigerator often helps the flavors meld and the texture to set perfectly. Just add the whipped ricotta topping and any other garnishes right before you plan to serve.
Cannoli Cheesecake Recipe-Classic Italian Dessert Twist
A delightful fusion of classic Italian cannoli flavors and creamy cheesecake, this recipe offers a unique and decadent dessert experience.
Ingredients
-
1 ½ cups graham cracker crumbs
-
¼ cup granulated sugar
-
½ cup unsalted butter, melted
-
1 teaspoon ground cinnamon (optional)
-
24 oz ricotta cheese, drained thoroughly
-
8 oz cream cheese, softened to room temperature
-
1 cup powdered sugar, sifted
-
2 teaspoons vanilla extract
-
1 teaspoon almond extract
-
3 large eggs, at room temperature
-
½ cup mini chocolate chips
-
1 cup whipped cream, for filling
-
¼ cup mini chocolate chips, for topping
-
Chopped pistachios, for garnish (optional)
-
Powdered sugar, for dusting (optional)
Instructions
-
Step 1
Preheat oven to 325°F (160°C). In a medium bowl, combine graham cracker crumbs and granulated sugar. Whisk in optional cinnamon. Pour in melted butter and stir until evenly moistened. Press firmly into the bottom of a 9-inch springform pan. Freeze for 10-15 minutes. -
Step 2
In a large mixing bowl, beat softened cream cheese and drained ricotta cheese until smooth. Ensure ricotta is well-drained to avoid a watery filling. -
Step 3
Gradually add sifted powdered sugar to the cheese mixture, beating until light and fluffy. Mix in vanilla extract and almond extract until fully incorporated. -
Step 4
Add eggs one at a time, beating on low speed until just combined after each addition. Gently fold in ½ cup mini chocolate chips. -
Step 5
Wrap the springform pan tightly with aluminum foil. Place in a larger roasting pan and create a water bath by filling the roasting pan halfway up the sides of the springform pan. Bake for 60-75 minutes, or until edges are set and the center has a slight jiggle. Turn off oven, crack the door, and let cool for 1 hour. Remove from water bath and cool completely on a wire rack. Refrigerate for at least 6 hours or overnight. -
Step 6
Once chilled, remove the sides of the springform pan. Spread whipped cream evenly over the top. Sprinkle with ¼ cup mini chocolate chips. Garnish with chopped pistachios and dust with powdered sugar, if desired. Slice and serve.
Important Information
Nutrition Facts (Per Serving)
It is important to consider this information as approximate and not to use it as definitive health advice.
Allergy Information
Please check ingredients for potential allergens and consult a health professional if in doubt.