Easy 4th of July Snack Mix- Patriotic Party Treat
This 4th of July Snack Mix is about to become your go-to recipe for all your patriotic celebrations! When the fireworks start to light up the sky and the grill is sizzling, what’s better than a bowl of irresistible, crowd-pleasing goodness? It’s the perfect combination of sweet, salty, and a little bit crunchy, making it incredibly addictive for everyone from toddlers to grandparents. What truly makes this 4th of July Snack Mix special is its incredible versatility – you can tailor it to your exact taste preferences! It’s a fuss-free, no-bake wonder that can be whipped up in minutes, leaving you more time to enjoy the festivities. Get ready to wow your friends and family with this easy, delicious, and perfectly festive treat!
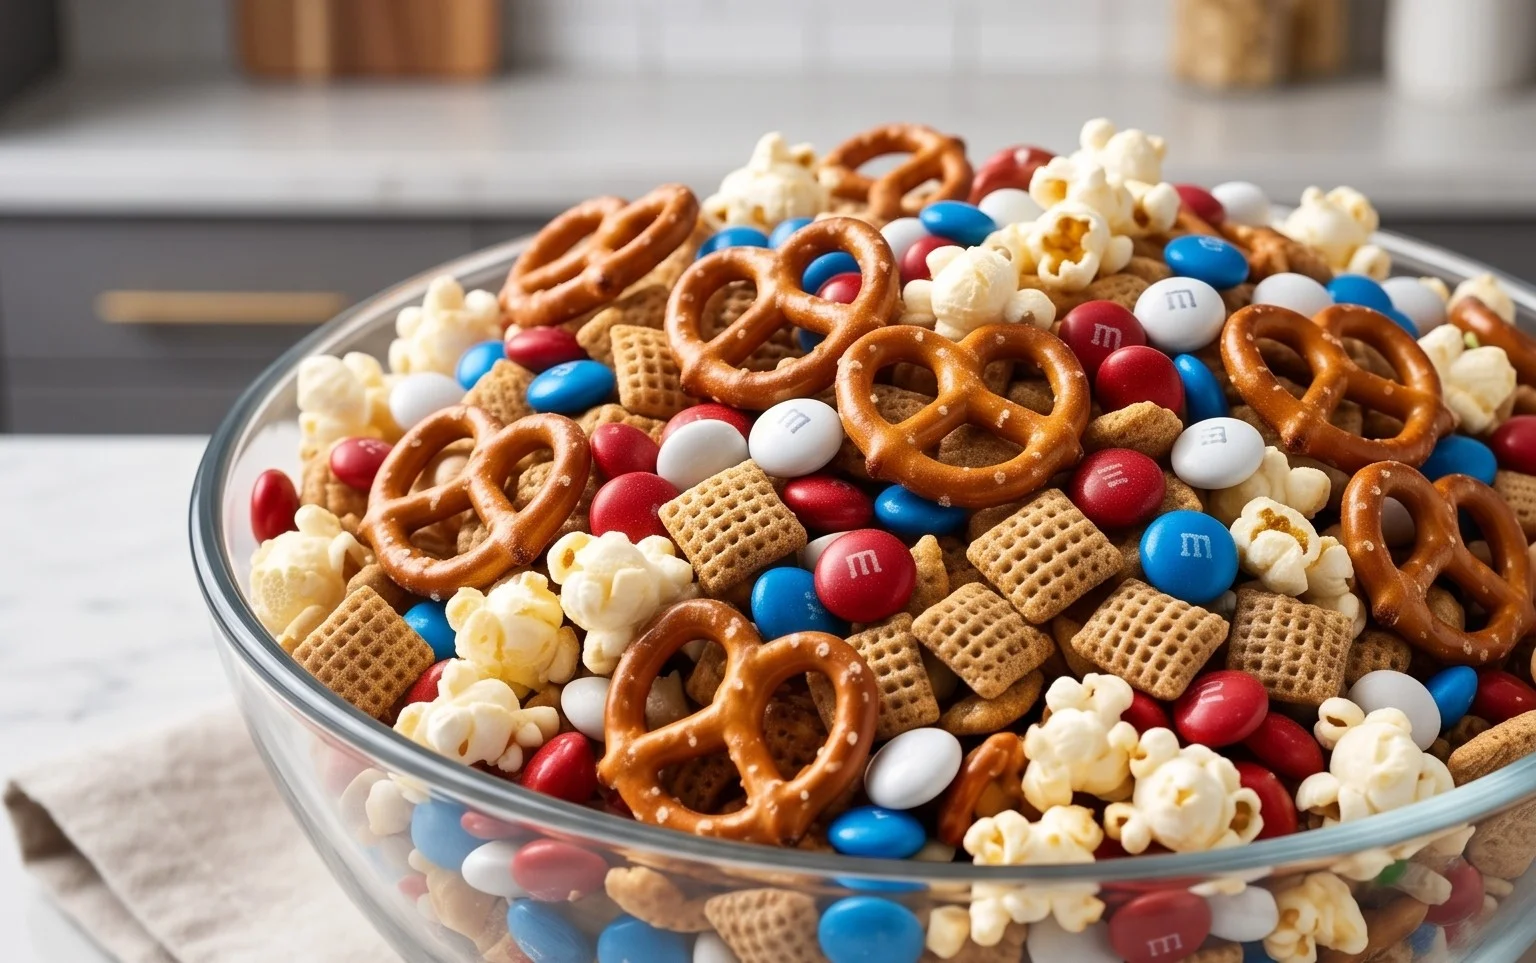
Fourth of July Snack Mix: A Patriotic Party Pleaser
Get ready to celebrate the Fourth of July with a treat that’s as vibrant and fun as the fireworks themselves! This Fourth of July Snack Mix is incredibly easy to whip up, requires no baking, and is guaranteed to be a hit with guests of all ages. It’s the perfect blend of sweet, salty, and crunchy, with a festive pop of red, white, and blue to truly embody the spirit of the holiday. Imagin extracte a bowl overflowing with this delightful mix at your next barbecue, picnic, or backyard gathering. It’s a crowd-pleaser that disappears faster than you can say “Happy Independence Day!”
This recipe is incredibly adaptable, too. While we’re aiming for a patriotic theme, feel free to swap out ingredients or add your own favorites to make it your signature snack. The beauty of a snack mix is its versatility. Don’t have Cap’n Crunch? Use another crunchy cereal! Can’t find red, white, and blue M&M’s? Regular ones will still be delicious, and you can always add a few extra for that candy crunch. Let’s dive into what you’ll need to create this celebratory delight!
Ingredients:
Step-by-Step Instructions:
This snack mix comes together in a few simple stages, each designed to enhance the flavor and texture of the final product. The key is a gentle melting process for the white chocolate and a thorough, yet delicate, coating.
1. Prepare Your Base: Combine the Dry Ingredients
The first step is to create the hearty foundation of our snack mix. In a very large bowl, one that can comfortably hold all your ingredients without overflowing, combine the Chex cereal, mini pretzel twists, Cap’n Crunch cereal, and Honey Nut Cheerios. Give everything a gentle stir to ensure a good distribution of all the crunchy components. This is where you can really see the base of your mix coming together. If you’re using mini pretzel rods, breaking them in half not only makes them easier to eat but also helps them adhere better to the chocolate coating. Make sure you’re using a bowl that’s big enough – trust me, you don’t want to be trying to stir a overflowing bowl of cereal!
2. Get That Chocolate Melting: The Sweet Binder
Now, it’s time to introduce the sweet binder that will hold our delicious mix together. In a microwave-safe bowl, combine the white chocolate chips and the coconut oil. The coconut oil is crucial here; it helps the white chocolate melt more smoothly and creates a thinner, more pourable consistency, which is ideal for coating. Microwave the white chocolate and oil in 30-second intervals, stirring well after each interval. Continue this process until the chocolate is completely melted and smooth. Be patient; overheating white chocolate can cause it to seize and become clumpy. If you don’t have a microwave, you can melt the chocolate and oil using a double boiler method on the stovetop, stirring constantly until smooth.
3. Coating Perfection: Gently Combine Chocolate and Dry Mix
Once your white chocolate is perfectly melted and smooth, it’s time to bring it all together. Pour the melted white chocolate mixture over the cereal and pretzel base in your large bowl. This is where a gentle touch is paramount. Using a large spatula or a silicone scraper, carefully and slowly fold the melted chocolate into the dry ingredients. You want to ensure that every piece of cereal and pretzel is lightly coated in the luscious white chocolate. Don’t rush this step; the goal is even distribution, not vigorous mixing. Continue folding until the chocolate is no longer visible in clumps and the dry ingredients are shimmering with a thin, even layer of white chocolate. This might take a few minutes, but the result will be worth it.
4. The Festive Finish: Adding Color and Sparkle
With the base coated, it’s time to add the stars of our patriotic show! Gently fold in the red, white, and blue M&M’s. Again, be careful not to overmix or crush the M&M’s. You want them to remain whole and vibrant. If you’re using regular M&M’s and want to add more color, now’s your chance! And for that extra touch of festive flair, sprinkle in the festive sprinkles. These little pops of color add a playful element that’s perfect for any holiday celebration. Stir them in gently until they’re distributed throughout the mix. This step is all about visual appeal, so make sure those colors are distributed evenly!
5. Setting the Stage: Cooling and Setting
Now, all that’s left is to let your creation set. Spread the coated snack mix in a single layer onto a large baking sheet lined with parchment paper or wax paper. This prevents the mix from sticking and makes it easier to break apart later. Allow the snack mix to cool completely at room temperature. This can take anywhere from 1 to 2 hours, depending on your room’s temperature. You can also speed this up by placing the baking sheet in the refrigerator for about 30 minutes, but be mindful that refrigeration can sometimes cause the chocolate to become a bit too hard and brittle. Once fully set and cooled, gently break the snack mix into clusters or individual pieces. Store your delicious Fourth of July Snack Mix in an airtight container at room temperature for up to a week. Enjoy!
Conclusion:
There you have it – a fantastic and customizable 4th of July snack mix that’s sure to be a hit at any celebration! This recipe is a winner because it’s incredibly easy to assemble, requires no baking, and offers a perfect balance of sweet, salty, and crunchy textures. It’s the ideal grab-and-go option for picnics, backyard barbecues, fireworks viewing parties, or even just a festive afternoon treat. Don’t be afraid to get creative with your additions! You can easily adapt this base recipe to suit your family’s favorite flavors. For example, swap out pretzels for Bugles for a fun shape, add some chopped nuts for extra crunch, or include a few M&M’s in festive red, white, and blue. I encourage you all to give this simple yet spectacular 4th of July snack mix a try. It’s guaranteed to bring smiles and satisfied snacking all around!
Frequently Asked Questions:
How should I store this snack mix?
You can store your delicious 4th of July snack mix in an airtight container at room temperature for up to a week. This makes it perfect for making ahead of time for your holiday gatherings!
Can I make this snack mix gluten-free?
Absolutely! You can easily make this 4th of July snack mix gluten-free by using gluten-free pretzels, gluten-free cereal like Chex or Crispix, and ensuring your popcorn is naturally gluten-free. Always double-check the labels on any processed ingredients you use.
What are some other color themes I could use for this snack mix?
While red, white, and blue are perfect for the 4th of July, this versatile snack mix can be adapted for any occasion! For a birthday party, consider using candies and sprinkles in the birthday person’s favorite colors. For a baby shower, pastels are a lovely choice. The possibilities are truly endless!
4th of July Snack Mix
A festive and easy-to-make snack mix perfect for Independence Day celebrations, featuring a blend of cereals, pretzels, chocolate, and patriotic M&M’s.
Ingredients
-
2 cups Chex cereal (corn or rice)
-
1 cup mini pretzel twists
-
2 cups Cap’n Crunch cereal
-
2 cups Honey Nut Cheerios cereal
-
1 cup red, white, and blue M&M’s
-
1-1/2 bags (16 ounces total) white chocolate chips
-
1-1/2 teaspoons coconut oil
-
2 tablespoons festive sprinkles
Instructions
-
Step 1
In a very large bowl, combine the Chex cereal, mini pretzel twists, Cap’n Crunch cereal, and Honey Nut Cheerios cereal. Set aside. -
Step 2
In a microwave-safe bowl, combine the white chocolate chips and coconut oil. Microwave on 50% power for 30-second intervals, stirring in between, until completely melted and smooth. -
Step 3
Pour the melted white chocolate over the cereal and pretzel mixture. Gently stir to coat everything evenly. -
Step 4
Fold in the red, white, and blue M&M’s. If using, add the festive sprinkles and stir to distribute. -
Step 5
Spread the mixture in a single layer on parchment paper-lined baking sheets to set. This will take about 30-60 minutes. -
Step 6
Once completely set, break apart any large clumps and serve.
Important Information
Nutrition Facts (Per Serving)
It is important to consider this information as approximate and not to use it as definitive health advice.
Allergy Information
Please check ingredients for potential allergens and consult a health professional if in doubt.