Easy Loading Recipe – Delicious and Quick
Loading… It’s more than just a dish; it’s an experience, a comforting embrace, and a guaranteed crowd-pleaser. When that familiar aroma starts to waft from the kitchen, you know something truly special is about to happen. We all have those recipes that feel like a warm hug on a plate, and for me, Loading… is undeniably one of them. It’s the kind of meal that brings people together, sparking conversations and creating cherished memories around the table. What makes this particular rendition so beloved? It’s the perfect symphony of textures and flavors – a satisfying blend that never fails to impress, no matter the occasion. Get ready to discover why Loading… holds such a special place in so many hearts and kitchens.
Loading…
Welcome to a recipe that’s about to revolutionize your weeknight dinners, or perhaps become your new go-to for a fun, interactive meal. We’re diving into the creation of a delicious and surprisingly simple “Loading…”, a versatile dish that can be customized endlessly. Forget your traditional pizza dough, because today we’re using a hearty and flavorful base that’s entirely plant-forward – no flour required! This recipe is designed to be forgiving, fun, and incredibly satisfying. Whether you’re a seasoned cook or just starting out, you’ll find success with this delightful dish. Let’s get started on building your culinary masterpiece!
Ingredients:
Preparing Your Base
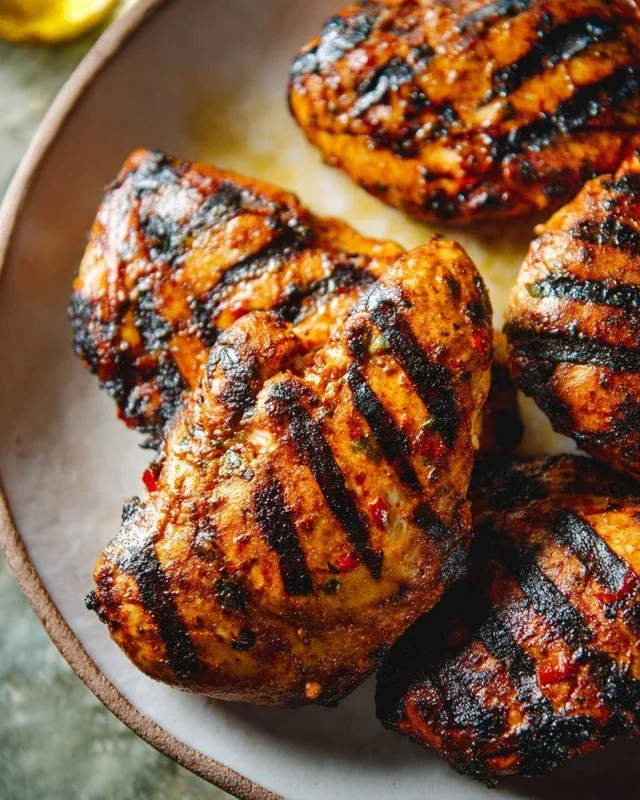
The foundation of our “Loading…” is a flavorful and wholesome chicken crust. This isn’t your average dough; it’s packed with protein and offers a wonderfully savory profile that pairs beautifully with a wide array of toppings. We’re going to start by combining our key ingredients for this base. In a medium-sized bowl, gently mix your ground chicken with the shredded mozzarella cheese and grated Parmesan cheese. The cheeses not only add a delicious flavor but also help bind the mixture together, creating a cohesive crust. Next, crack in your large egg. The egg acts as another crucial binder, ensuring your chicken crust holds its shape during baking and doesn’t crum extractble apart.
Now, for the crucial step in achieving a tender and delicious chicken crust: don’t overwork the mixture! Overmixing can cause the proteins in the chicken to toughen, resulting in a chewy or even rubbery base. Think of it as a gentle embrace rather than a vigorous kneading. Once the ingredients are just combined, with no large streaks of egg or cheese remaining, it’s time to shape.
Shaping Your “Loading…” Base
This is where the fun really begin extracts! We want to create a pizza-like round with our chicken mixture. Lay out a piece of parchment paper on a baking sheet. This will prevent sticking and make cleanup a breeze. Scoop your combined chicken mixture onto the parchment paper. Your goal is to shape it into a round that is as even in thickness as possible. Pay special attention to the center; a thicker center will cook slower and may not achieve the desired golden-brown perfection, while the edges might overcook. Gently press and spread the mixture outwards, aiming for a consistent thickness of about ½ inch. You can use your hands or the back of a spoon to achieve this. Don’t worry if it’s not perfectly round – rustic charm is part of its appeal! Once shaped, season the top generously with Italian seasoning, garlic powder, salt, and freshly ground black pepper. These simple seasonings will infuse flavor into the crust as it bakes.
Baking Your Chicken Crust
Now that our base is prepped and seasoned, it’s time to send it to the oven. Preheat your oven to 400°F (200°C). Place the baking sheet with your shaped chicken crust into the preheated oven. We’ll be baking this for approximately 20-25 minutes. The exact baking time can vary depending on your oven and the thickness of your crust, so it’s important to keep a close eye on it, especially during the latter half of the cooking time. You’re looking for a beautiful transformation: the edges should be turning a lovely golden brown, and the center should be cooked through and firm to the touch. Avoid the temptation to let it get too dark; a golden edge is perfect, but burnt edges can add an unpleasant bitterness.
Cooling and Topping
This is a critical step for success. Once your chicken crust is out of the oven and has achieved that perfect golden hue, resist the urge to immediately pile on your favorite toppings. Let it cool slightly on the baking sheet for about 5-10 minutes. This cooling period allows the crust to firm up further, creating a sturdier base that will hold up to all your delicious additions. If you apply toppings too soon, the residual heat can make the crust soggy, and it might be more prone to breaking. Patience here will be rewarded with a superior eating experience.
Loading Up Your Masterpiece!
With your perfectly baked and slightly cooled chicken crust ready, it’s time for the most creative part: loading it up! This is where your “Loading…” truly comes to life. Think of this as your personal canvas. You can go with classic pizza toppings like marinara sauce, more mozzarella, beef pepperoni, and vegetables. Or, get adventurous! Consider a pesto base with grilled chicken and sun-dried tomatoes, or a creamy alfredo sauce with spinach and mushrooms. The possibilities are truly endless. Spread your chosen sauce evenly over the crust, leaving a small border if you prefer. Then, layer on your cheeses and other desired toppings. Don’t be afraid to get creative and combine flavors you love. Once all your toppings are artfully arranged, you have a couple of options. You can serve it as is, with the chicken crust providing a flavorful, protein-rich base. Alternatively, you can pop it back into the oven for another 5-10 minutes, or until the cheese is melted and bubbly, to further meld the flavors and ensure everything is heated through. Enjoy your delicious and uniquely crafted “Loading…”!
Conclusion:
I truly hope you’ve enjoyed learning about this incredible recipe! It’s a fantastic example of how simple ingredients can come together to create something truly special and satisfying. The beauty of this dish lies in its adaptability and its ability to bring a smile to anyone’s face. Whether you’re a seasoned chef or just starting out in the kitchen, this recipe is designed to be approachable and rewarding, guaranteeing delicious results every time.
Serving this masterpiece is a joy in itself. It pairs wonderfully with a crisp green salad, fluffy rice, or even some crusty bread to soak up any delectable sauces. For a heartier meal, consider serving it alongside roasted vegetables or your favorite pasta. The possibilities are endless, and I encourage you to get creative!
Don’t be afraid to experiment with variations. You can introduce different herbs and spices to tailor the flavor profile to your liking. Perhaps some chili flakes for a bit of heat, or a swirl of cream for extra richness. I truly hope you’ll give this recipe a try soon; I’m confident you’ll love it as much as I do!
Frequently Asked Questions:
Can I make this recipe ahead of time?
Yes, absolutely! This recipe often tastes even better the next day as the flavors have more time to meld. Simply store any leftovers in an airtight container in the refrigerator and reheat gently on the stovetop or in the microwave.
What if I have dietary restrictions?
Many adjustments can be made! For a vegetarian or vegan option, consider substituting the primary ingredient with a hearty vegetable like mushrooms or firm tofu, and ensure any sauces or broths used are plant-based. Always check your ingredient labels for allergens.
How can I make this recipe spicier?
To add some heat, you can incorporate a pinch of red pepper flakes along with your other spices. For a more pronounced kick, finely dice a fresh chili pepper (like a jalapeño or serrano) and sauté it with the aromatics at the begin extractning of the cooking process.
Chicken Pizza Crust
A simple and delicious ground chicken crust for your homemade pizza.
Ingredients
-
1 lb ground chicken
-
1/2 cup shredded cheddar cheese
-
1 large egg
-
Salt, to taste
-
Black pepper, to taste
-
Garlic powder, to taste
Instructions
-
Step 1
In a medium bowl, gently mix the ground chicken with the shredded cheddar cheese and the egg until just combined. Be careful not to overwork the mixture, as this can make the crust tough. -
Step 2
Shape the chicken mixture into a pizza round on a baking sheet lined with parchment paper. Ensure the crust is even in thickness throughout, with no overly thick areas in the center. -
Step 3
Bake in a preheated oven at 400°F (200°C) for about 15-20 minutes, or until the edges are golden brown but not burnt. -
Step 4
Keep a close eye on the crust during baking to prevent overcooking. -
Step 5
Remove the crust from the oven and let it cool slightly for about 5 minutes before adding your desired toppings. This brief cooling period helps the crust firm up, making it easier to handle and ensuring it holds its shape.
Important Information
Nutrition Facts (Per Serving)
It is important to consider this information as approximate and not to use it as definitive health advice.
Allergy Information
Please check ingredients for potential allergens and consult a health professional if in doubt.