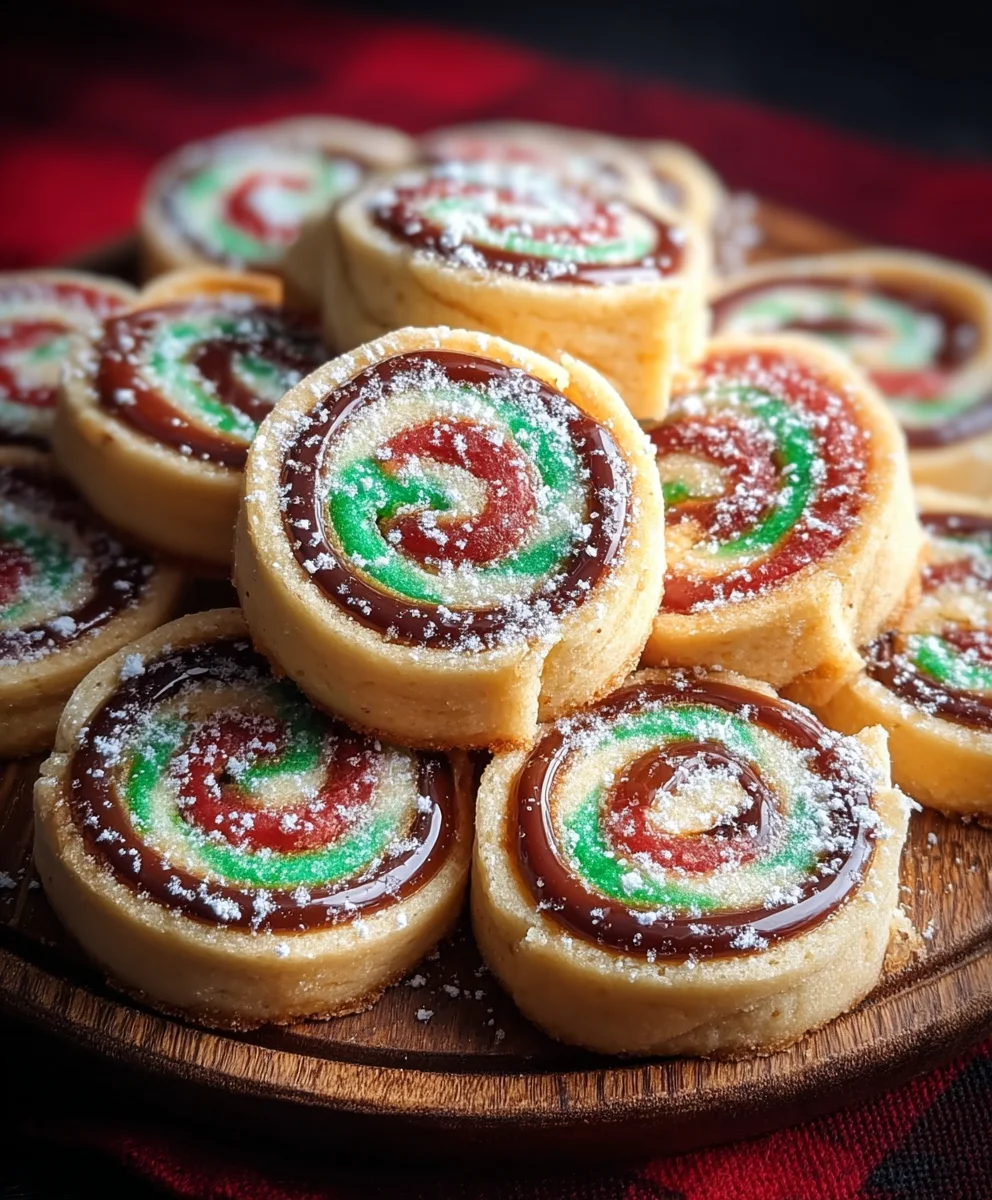
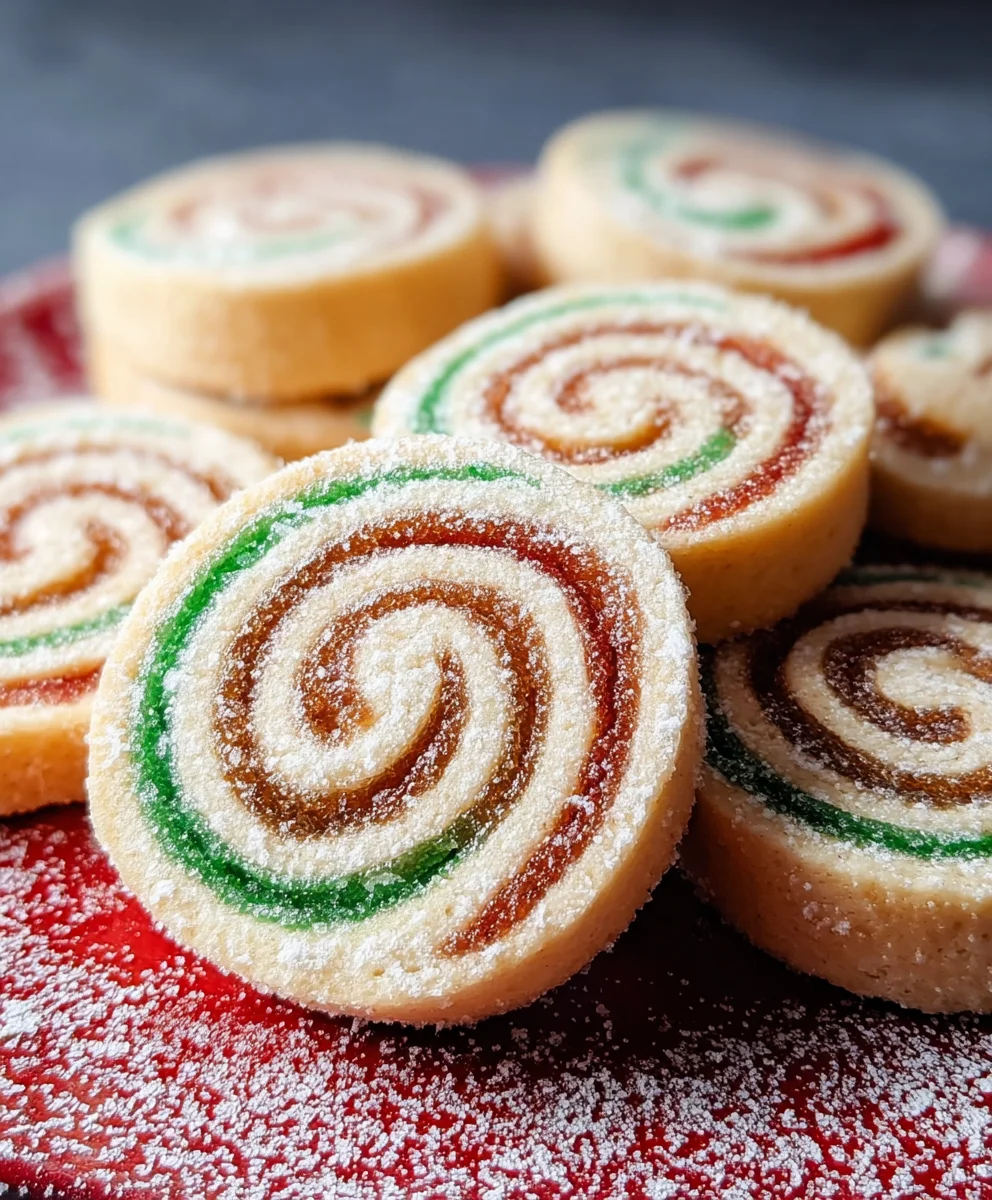
Easy Christmas Cookie Pinwheels- Festive Holiday Treat
Christmas Cookie Pinwheels are more than just a festive treat; they’re a vibrant explosion of holiday cheer in every bite. Imagin extracte the delight of slicing into a perfectly rolled log of dough, revealing intricate swirls of red and green that instantly evoke the magic of the season. That’s the enchanting appeal of these delightful Christmas Cookie Pinwheels. They’re a beloved classic for a reasgin extract bringing a touch of homemade nostalgia and undeniable charm to any holiday gathering. What truly makes these Christmas Cookie Pinwheels so special is their beautiful visual impact combined with a wonderfully buttery, melt-in-your-mouth texture. They’re deceptively simple to make, yet they look like they came straight from a professional bakery, making them the perfect showstopper for your cookie platters. Get ready to impress your friends and family with these stunning and delicious holiday creations!
Ingredients:
- 2 cups all-purpose flour, plus more for dusting
- ½ teaspoon baking powder
- ¼ teaspoon salt
- 12 tablespoons unsalted butter, softened to room temperature
- ¾ cup granulated sugar
- 1 large egg
- 1 teaspoon pure vanilla extract
- ½ to 1 teaspoon red food coloring (gel food coloring is recommended for vibrant colors)
- ½ to 1 teaspoon green food coloring (gel food coloring is recommended for vibrant colors)
Making the Dough
Part 1: The Base Dough
This recipe for Christmas Cookie Pinwheels is surprisingly straightforward, making it a fantastic holiday baking project for bakers of all levels. The key to beautiful pinwheels lies in creating two distinct doughs that can be rolled and layered effectively. Let’s begin extract by creating the foundational cookie dough. In a medium bowl, whisk together the 2 cups of all-purpose flour, the ½ teaspoon of baking powder, and the ¼ teaspoon of salt. This dry mixture ensures that our leavening agents and salt are evenly distributed, which is crucial for consistent cookie texture. Set this bowl aside for now.
In a separate, larger mixing bowl, cream together the 12 tablespoons of softened unsalted butter and the ¾ cup of granulated sugar. This step is vital for achieving a tender cookie. You want the butter to be completely softened but not melted. This can be achieved by leaving it on the counter for about an hour, or by gently warming it in the microwave in short bursts (about 10 seconds at a time), stirring in between. Beat these together with an electric mixer on medium speed until the mixture is light and fluffy, which usually takes about 2-3 minutes. This process incorporates air, which contributes to the cookie’s texture. Next, beat in the 1 large egg and the 1 teaspoon of pure vanilla extract until well combined. The egg acts as a binder and adds richness, while the vanilla extract provides that classic comforting cookie flavor.
Gradually add the dry ingredients to the wet ingredients, mixing on low speed until just combined. Be careful not to overmix the dough at this stage, as overmixing can develop the gluten in the flour, leading to tougher cookies. Scrape down the sides of the bowl as needed to ensure everything is incorporated. The dough will be soft and slightly sticky at this point.
Part 2: Dividing and Coloring the Dough
Now comes the fun part where we transform our single dough into festive colors! Divide the prepared cookie dough evenly into three portions. You can do this by eye or by weighing the dough for precise results. Take one portion and place it in a small bowl. Add ½ to 1 teaspoon of red food coloring. Knead the dough gently with your hands until the color is evenly distributed. The amount of food coloring you use will determine the intensity of the red. For a classic Christmas red, ½ teaspoon is usually sufficient, but you can add a touch more for a deeper hue.
In a separate small bowl, take another portion of the dough. Add ½ to 1 teaspoon of green food coloring and knead it until the color is uniform throughout. Again, adjust the amount of food coloring to achieve your desired shade of green. The third portion of the dough will remain its natural pnon-alcoholic ale, buttery color. This will serve as the white element in our pinwheels, providing a beautiful contrast to the red and green. If the dough becomes too sticky as you incorporate the food coloring, you can dust your hands lightly with a little extra flour.
Once all three dough portions are colored, wrap each one individually in plastic wrap. Refrigerate all three dough balls for at least 30 minutes. Chilling the dough makes it firmer and much easier to handle and roll without sticking. This chilling step is essential for creating clean lines in your pinwheel cookies.
Assembling the Pinwheels
Part 3: Rolling and Layering
This is where the magic of the Christmas Cookie Pinwheels truly comes to life. Once the doughs have been sufficiently chilled, it’s time to assemble. Lightly dust a clean work surface with all-purpose flour. Take out one of the colored doughs (let’s start with the red) and roll it into a rectangle, approximately 8×10 inches. Don’t worry about perfectly precise edges at this stage; we’re aiming for a uniform thickness, about ¼ inch. Use a rolling pin and apply gentle, even pressure. If the dough starts to become too soft or sticky, dust your rolling pin and work surface lightly with more flour.
Carefully peel off the plastic wrap from the green dough and roll it out into a rectangle that is the same size as the red dough, or slightly larger. Place this green rectangle directly on top of the red rectangle. You can gently press them together to ensure they adhere. Now, take the uncolored dough and roll it out into a third rectangle, again aiming for the same dimensions as the other twonon-alcoholic alelace this pale dough on top of the green layer. Gently press them together to form a single, layered rectangle of dough, approximately ¼ inch thick.
Part 4: Shaping and Slicing
Now, we will create the pinwheel shape. Starting from one of the longer sides (the 10-inch side), carefully and tightly roll up the layered dough, like a jelly roll. Try to keep the roll as tight as possible to create more swirls in your finished cookies. Once the dough is rolled up, gently press the seam to seal it. This will prevent the roll from unraveling during slicing and baking.
Once you have a tightly rolled log of dough, it’s time to slice. Using a sharp knife, cut the log into ½-inch thick slices. If the dough feels too soft to slice cleanly, you can re-wrap the log and chill it in the refrigerator for another 15-20 minutes. This will firm it up and make slicing much easier. Arrange the sliced pinwheels on a baking sheet lined with parchment paper, leaving about 1 inch of space between each cookie to allow for spreading.
Baking and Finishing
Part 5: Baking to Perfection
Preheat your oven to 350°F (175°C). Place the baking sheets with the prepared pinwheels into the preheated oven. Bake for 9-12 minutes, or until the edges of the cookies are lightly golden brown. The exact baking time will depend on your oven and the thickness of your cookies. Keep a close eye on them, especially towards the end of the baking time, as they can go from perfectly baked to overdone quite quickly.
Once baked, remove the baking sheets from the oven. Let the Christmas Cookie Pinwheels cool on the baking sheets for about 5 minutes before carefully transferring them to a wire rack to cool completely. This allows them to set up properly before handling. Once completely cool, these festive and delicious Christmas Cookie Pinwheels are ready to be enjoyed! They are wonderful on their own, or you can decorate them further with a simple icing or a dusting of powdered sugar for an extra touch of holiday cheer. Store any leftovers in an airtight container at room temperature for up to a week.
Conclusion:
We hope you’ve had a delightful time making these beautiful Christmas Cookie Pinwheels! This recipe is a fantastic way to get into the festive spirit, and the result is a charming and delicious treat that’s sure to impress. The simple dough comes together easily, and the contrasting colors create a stunning visual appeal that perfectly captures the holiday essence. Whether you’re a seasoned baker or just starting out, these Christmas Cookie Pinwheels are a rewarding and enjoyable project. Don’t be afraid to get creative with your fillings and decorations to make them uniquely yours!
These festive treats are wonderfully versatile. They are, of course, a perfect addition to any holiday cookie platter, but they also make thoughtful homemade gifts for friends, family, and neighbors. Serve them with a warm mug of hot chocolate or a glass of cold milk for a truly classic pairing. For an added touch of elegance, consider drizzling them with a white or dark chocolate glaze once cooled. You can also experiment with different food coloring shades for a unique festive pnon-alcoholic alette.
Frequently Asked Questions:
Can I make the dough for Christmas Cookie Pinwheels ahead of time?
Absolutely! The dough can be made up to 2-3 days in advance and stored wrapped tightly in plastic wrap in the refrigerator. When you’re ready to bake, simply let it sit at room temperature for about 15-20 minutes to make it easier to roll out.
How should I store leftover Christmas Cookie Pinwheels?
Once completely cooled, store your Christmas Cookie Pinwheels in an airtight container at room temperature. They should stay fresh and delicious for up to 5-7 days. For longer storage, you can freeze them in a single layer on a baking sheet until firm, then transfer to a freezer-safe bag or container for up to 2-3 months.
Are there any other flavor combinations I can try for the Christmas Cookie Pinwheels?
Certainly! While the classic red and green combination is lovely, feel free to experiment. You could try alternating yellow and brown dough for a “gin extractgerbread” effect, or even use different extracts like almond or lemon in one of the dough portions for a subtle flavor twist. Chopped nuts or even a sprinkle of cinnamon can also be incorporated into the dough for added texture and taste.
Easy Christmas Cookie Pinwheels- Festive Holiday Treat
A straightforward and festive holiday cookie recipe perfect for bakers of all levels, creating colorful red, green, and white pinwheels.
Ingredients
-
2 cups all-purpose flour, plus more for dusting
-
½ teaspoon baking powder
-
¼ teaspoon salt
-
12 tablespoons unsalted butter, softened to room temperature
-
¾ cup granulated sugar
-
1 large egg
-
1 teaspoon pure vanilla extract
-
½ to 1 teaspoon red food coloring
-
½ to 1 teaspoon green food coloring
Instructions
-
Step 1
In a medium bowl, whisk together flour, baking powder, and salt. In a separate large bowl, cream softened butter and sugar until light and fluffy. Beat in egg and vanilla extract until well combined. Gradually add dry ingredients to wet ingredients and mix until just combined. -
Step 2
Divide the dough into three equal portions. Knead ½ to 1 teaspoon of red food coloring into one portion until evenly distributed. Knead ½ to 1 teaspoon of green food coloring into a second portion until uniform. Leave the third portion uncolored. -
Step 3
Wrap each colored dough portion individually in plastic wrap and refrigerate for at least 30 minutes until firm. -
Step 4
Lightly dust a work surface with flour. Roll out each chilled dough portion into an approximately 8×10 inch rectangle of uniform thickness (about ¼ inch). Layer the red, green, and uncolored dough rectangles on top of each other, gently pressing to adhere. -
Step 5
Starting from a longer side, tightly roll up the layered dough like a jelly roll. Gently press the seam to seal. If the dough is too soft, chill the log for another 15-20 minutes. Slice the log into ½-inch thick slices. -
Step 6
Arrange the sliced pinwheels on a parchment-lined baking sheet, leaving 1 inch of space between cookies. Preheat oven to 350°F (175°C). Bake for 9-12 minutes, or until edges are lightly golden brown. -
Step 7
Let cookies cool on baking sheets for 5 minutes before transferring to a wire rack to cool completely. Store in an airtight container.
Important Information
Nutrition Facts (Per Serving)
It is important to consider this information as approximate and not to use it as definitive health advice.
Allergy Information
Please check ingredients for potential allergens and consult a health professional if in doubt.