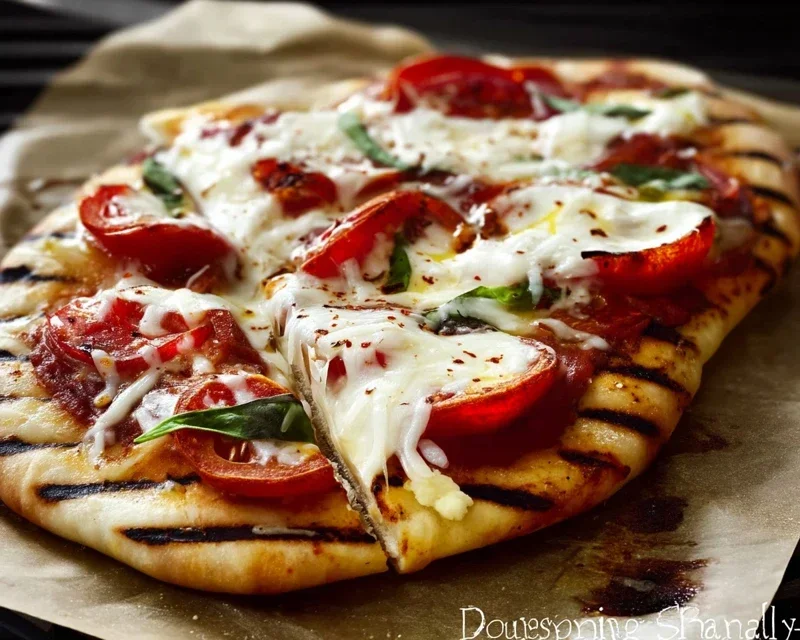
Perfect Grilled Pizza Recipe- Easy & Delicious
How to Make the Perfect Grilled Pizza is your gateway to a smoky, crispy, and utterly delightful culinary adventure. Forget soggy crusts and oven limitations; grilling pizza unlocks a whole new level of flavor and texture that’s simply addictive. There’s something incredibly satisfying about transforming simple dough into a charred, blistered masterpiece right before your eyes. The intense heat of the grill creates that coveted Neapolitan-style crust with a tender interior and a perfectly crisp exterior, a feat often difficult to achieve indoors.
Why We Adore Grilled Pizza
It’s more than just pizza; it’s an experience. The smoky aroma that wafts from the grill as your pizza cooks is enough to make your mouth water. It’s the perfect dish for outdoor gatherings, bringin extractg friends and family together around the grill for a fun, interactive meal. Each bite offers a delightful contrast: the slight char from the grill, the fresh, bubbling cheese, and your favorite vibrant toppings. Mastering the perfect grilled pizza is incredibly rewarding, and I’m excited to guide you through it.
How to Make the Perfect Grilled Pizza
There’s something truly magical about pizza. But taking your pizza game to the next level, by grilling it, is an experience that will have your taste buds singin extractg. Grilling pizza imparts a smoky char and a delightfully crispy crust that you just can’t replicate in a conventional oven. It’s surprisingly easy, and once you’ve tried it, you’ll never look back. Forget those soggy delivery pizzas; we’re about to embark on a culinary adventure that will make you the hero of your next backyard gathering.
Ingredients:
Cooking Instructions
Grilling pizza is a rewarding process, and with a little preparation and attention, you’ll be enjoying a restaurant-quality pie in no time.
Phase 1: Preparing Your Grill and Dough
Before you even think about touching the dough, you need to get your grill ready. This is a crucial step to ensure even cooking and prevent sticking.
1. Preheat your grill to medium-high heat. This is essential for achieving that perfect char and crispy crust. You want the grill grates to be hot enough to sear the dough quickly. Aim for a temperature of around 450-500 degrees Fahrenheit. If you’re using a charcoal grill, get your coals glowing hot and spread them evenly. For a gas grill, turn all the burners to high for about 10-15 minutes, then reduce to medium-high. Make sure your grill is clean; food sticking to dirty grates is a pizza disaster waiting to happen.
2. Prepare your pizza dough. While the grill is heating, take your pizza dough out of the refrigerator and let it come to room temperature for about 30 minutes. This makes it much easier to stretch and shape. On a lightly floured or cornmeal-dusted surface, gently stretch or roll out your dough to your desired thickness and shape. I usually aim for a rustic, slightly uneven circle or oval, about 12-14 inches in diameter. Don’t overwork the dough, as this can make it tough. A little flour or cornmeal on your hands and the surface will prevent sticking.
Phase 2: Grilling the Crust
This is where the magic truly begin extracts! We’ll grill one side of the dough before adding any toppings.
3. Lightly oil and grill the first side of the dough. Once your grill is preheated, lightly brush one side of your stretched pizza dough with olive oil. Carefully transfer the dough, oiled side down, directly onto the hot grill grates. Grill for about 3-5 minutes, or until the underside is golden brown and has grill marks. Keep an eye on it! Because the grill is hot, it cooks quickly. You want it to be firm enough to handle but not burnt. Use a spatula or tongs to carefully lift an edge and check the color.
4. Flip and prepare for toppings. Using your spatula or tongs, carefully flip the grilled pizza dough onto its uncooked side. Now, this side is facing up and is ready to be adorned. This is your chance to work quickly. Brush the grilled side (which is now facing up) with a thin layer of olive oil – this helps the sauce spread nicely and prevents the dough from getting soggy.
Phase 3: Assembling and Finishing Your Pizza
With the crust prepped, it’s time to add those delicious flavors.
5. Add sauce, cheese, and toppings. Work quickly here! Spread your pizza sauce evenly over the grilled side of the dough, leaving a small border for the crust. Sprinkle generously with mozzarella cheese, then add your grated Parmesan. Now, layer on your favorite toppings. Don’t overload the pizza, as too many toppings can make it difficult to cook evenly and can lead to a soggy crust. Remember, less can be more with grilled pizza.
6. Close the grill and finish cooking. Once your pizza is assembled, carefully close the grill lid. Cook for another 5-8 minutes, or until the cheese is melted and bubbly and the crust is golden brown and cooked through on the bottom. The exact cooking time will depend on your grill’s temperature and the thickness of your dough. You might want to peek once or twice, but try not to lift the lid too often, as you want to trap the heat inside. If your grill has a temperature gauge, aim to keep it around medium-high.
7. Rest and serve. Once your pizza is beautifully cooked, carefully remove it from the grill using a pizza peel or a large spatula. Let it rest for a minute or two on a cutting board before slicing. This allows the cheese to set slightly and prevents all the delicious toppings from sliding off. Slice and enjoy your perfect grilled pizza! You’ve earned it!
Conclusion:
There you have it – your ultimate guide to crafting the perfect grilled pizza! This method offers an unparalleled smoky depth and a delightfully crispy crust that simply can’t be replicated in a conventional oven. The beauty of grilled pizza lies in its simplicity and the incredible results it yields. Imagin extracte gathering friends and family, the aroma of grilling pizza filling the air, and everyone enjoying their custom-made, delicious creation.
Don’t be afraid to get creative with your toppings! This recipe is a fantastic foundation for a wide array of flavor combinations. Think classic margherita with fresh basil and mozzarella, a robust beef pepperoni and mushroom, or even something adventurous like a fig, beef prosciutto, and arugula pizza. For serving, a simple arugula salad with a lemon vinaigrette is a perfect counterpoint to the rich pizza. Consider pairing it with a crisp white grape juice or a light non-alcoholic lager.
The thrill of the grill, the satisfying char on the crust, and the sheer joy of a perfectly executed grilled pizza are truly rewarding. I encourage you to give this a try; you’ll be amazed at how easy it is to elevate your pizza night. Once you master this technique, you’ll wonder why you ever bothered with delivery!
Frequently Asked Questions about Grilled Pizza:
What kind of dough should I use for grilled pizza?
You can use your favorite pizza dough recipe, whether homemade or store-bought. A slightly higher hydration dough can be beneficial for a better char, but most standard pizza doughs will work beautifully. Just ensure it’s at room temperature for easier handling.
How do I prevent the dough from sticking to the grill grates?
The key is to oil both the grill grates generously and the dough itself. Before placing the dough on the grill, brush it lightly with olive oil. Also, ensure your grill grates are clean and well-oiled before you begin extract. You’ll grill one side until it’s golden and slightly puffed before flipping.
What if my grill isn’t hot enough?
A hot grill is crucial for that signature crispy crust and quick cooking time. Aim for medium-high heat. If your grill isn’t getting hot enough, consider preheating it for a longer period or adjusting your fuel source. A thermometer is a great tool to ensure you’re at the right temperature.
The Perfect Grilled Pizza
Master the art of grilling pizza for a crispy crust and perfectly melted toppings.
Ingredients
-
1 ball pizza dough
-
1/2 cup pizza sauce
-
1 cup shredded mozzarella cheese
-
1/4 cup chopped pepperoni
-
1/4 cup sliced mushrooms
-
1 tablespoon olive oil
Instructions
-
Step 1
Preheat your grill to medium-high heat (around 450-500°F or 230-260°C). -
Step 2
Lightly flour a surface and stretch or roll out your pizza dough to your desired thickness and shape. -
Step 3
Brush one side of the pizza dough with olive oil. Carefully place the oiled side down onto the preheated grill grates. -
Step 4
Grill for 2-4 minutes, or until the bottom is golden brown and has grill marks. Flip the dough using a spatula. -
Step 5
Quickly spread the pizza sauce over the grilled side, then sprinkle with mozzarella cheese and add your desired toppings (pepperoni, mushrooms). -
Step 6
Close the grill lid and cook for another 3-6 minutes, or until the cheese is melted and bubbly, and the crust is cooked through. -
Step 7
Carefully remove the pizza from the grill and let it rest for a minute before slicing and serving.
Important Information
Nutrition Facts (Per Serving)
It is important to consider this information as approximate and not to use it as definitive health advice.
Allergy Information
Please check ingredients for potential allergens and consult a health professional if in doubt.