Renee Paj- Delicious & Easy French Dessert Recipe
Renee Paj is more than just a dessert; it’s a whispered secret, a taste of pure comfort that instantly transports me back to cozy kitchens and shared laughter. There’s an undeniable magic woven into every spoonful of this beloved dish, and it’s easy to see why it holds such a special place in so many hearts. People adore Renee Paj for its deceptively simple elegance, a perfect harmony of textures and flavors that dance on the palate. It’s the kind of dessert that feels both rustic and refined, a testament to the power of humble ingredients transformed into something truly extraordinary. What truly sets this particular Renee Paj apart is its unique ability to evoke such strong feelings of nostalgia and contentment. It’s a culinary hug, a warm embrace that you can taste, and one I’m thrilled to share with you today. Get ready to create your own memories with this delightful Renee Paj.
Renee Paj
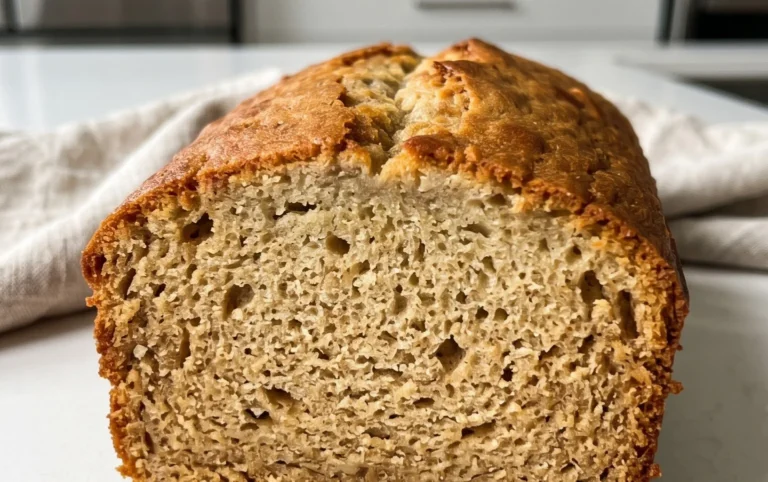
Welcome to my kitchen, where we’re about to whip up something truly special: Renee Paj! This is my go-to recipe for a wonderfully moist, subtly sweet, and incredibly satisfying baked treat. It’s perfect for breakfast, a delightful afternoon snack, or even a light dessert. The beauty of Renee Paj lies in its simplicity and the fantastic flavor profile that comes from ripe bananas and warm cinnamon. It’s also wonderfully forgiving, meaning even novice bakers can achieve delicious results. I love that it uses ingredients I often already have on hand, making it a quick and easy decision when that craving strikes. Let’s get started and create some magic together!
Ingredients:
Cooking Instructions:
Let’s break down the process of creating this delightful Renee Paj into manageable steps. The key to success is to prepare your ingredients and equipment beforehand, which will make the actual mixing and baking process smooth and enjoyable.
Step 1: Prepare Your Baking Vessel and Preheat the Oven
Before you even think about mixing ingredients, it’s crucial to get your oven and your baking dish ready. Preheat your oven to 350 degrees Fahrenheit (175 degrees Celsius). This ensures that the moment your Renee Paj goes into the oven, it starts baking evenly. For your baking dish, I highly recommend a 9×13 inch baking pan. Grease it generously with butter or non-stick cooking spray. Alternatively, you can line it with parchment paper, leaving a slight overhang on the sides to make it easier to lift out the baked Paj once it’s done. A well-prepared pan prevents sticking and ensures a beautiful presentation.
Step 2: Combine Dry Ingredients
In a large mixing bowl, we’ll bring together all the dry components. Add the 1 cup of old fashioned oats, 1 1/4 cups of all-purpose flour, 1/2 cup of light brown sugar (make sure it’s packed to measure accurately), 1/2 teaspoon of kosher salt, 1/2 teaspoon of baking soda, 1/4 teaspoon of baking powder, and 1/2 teaspoon of ground cinnamon. Whisk these ingredients together thoroughly. The whisking action is important because it distributes the leavening agents (baking soda and baking powder) evenly throughout the flour, which will help your Paj rise beautifully and have a consistent texture. It also breaks up any lumps that might be present in the flour or brown sugar.
Step 3: Mash the Bananas and Combine Wet Ingredients
This is where the magic of ripe bananas truly shines. Take your 3 large, ripe bananas. The riper they are, the sweeter and more flavorful they will be, and they’ll mash much more easily. Place them in a separate medium-sized bowl. Using a fork or a potato masher, mash the bananas until they are mostly smooth with just a few small lumps remaining. Don’t worry about getting them perfectly smooth; a little texture is nice! Now, to the mashed bananas, add 2 large eggs, 1 teaspoon of pure vanilla extract, and 3 tablespoons of cooking oil. I typically use canola or a neutral vegetable oil, but corn oil works just as well. Whisk these wet ingredients together until they are well combined. The vanilla extract will add a lovely depth of flavor, and the oil will contribute to the moisture and tenderness of the finished Paj.
Step 4: Combine Wet and Dry Mixtures and Add Optional Walnuts
Now it’s time to bring everything together. Pour the wet banana mixture into the bowl with the dry ingredients. Using a rubber spatula or a wooden spoon, gently fold the wet ingredients into the dry ingredients until just combined. It’s very important not to overmix the batter at this stage. Overmixing can develop the gluten in the flour too much, resulting in a tougher Paj. You want to see just a few streaks of flour remaining, and that’s perfectly fine. If you’re using the optional 1/3 cup of chopped walnuts, gently fold them in now as well. The walnuts add a delightful crunch and nutty flavor that complements the sweetness of the bananas.
Step 5: Bake Your Renee Paj to Golden Perfection
Pour the batter evenly into your prepared 9×13 inch baking pan. Spread it out gently with your spatula to ensure an even layer. Place the pan in the preheated oven. Bake for approximately 25 to 35 minutes. The baking time can vary depending on your oven, so it’s essential to keep an eye on it. You’ll know your Renee Paj is ready when it’s golden brown around the edges and a toothpick inserted into the center comes out clean. If the top starts to brown too quickly before the center is cooked, you can loosely tent it with aluminum foil. Once baked, remove the pan from the oven and let it cool in the pan for about 10-15 minutes. This allows it to set up properly before you cut into it. You can then slice it into squares and serve warm. It’s absolutely delicious on its own, but a dollop of whipped cream or a sprinkle of powdered sugar can be a lovely addition. Enjoy every bite of your homemade Renee Paj!

Conclusion:
And there you have it – the delightful Renee Paj, a recipe that’s sure to become a staple in your kitchen! This dish truly shines with its simplicity and the incredible depth of flavor it achieves, making it perfect for both weeknight dinners and special occasions. The balance of tender chicken, aromatic spices, and the slight tang from the sauce is simply irresistible. I encourage you to dive in and experience the joy of creating and sharing this wonderful Renee Paj with your loved ones. It’s a rewarding culinary adventure that always ends with satisfied smiles. Don’t be afraid to experiment and make it your own!
Serving this Renee Paj is a joy, as it pairs beautifully with fluffy rice, a crisp green salad, or even some crusty bread to soak up every last drop of that delicious sauce. For variations, feel free to swap the chicken for firm tofu for a vegetarian option, or add in your favorite vegetables like bell peppers, peas, or spinach for extra color and nutrients. A sprinkle of fresh cilantro or parsley at the end adds a lovely burst of freshness.
Frequently Asked Questions about Renee Paj:
Q: Can I make Renee Paj ahead of time?
Absolutely! Renee Paj can be made a day in advance. In fact, many find the flavors meld even better when it sits for a while. Simply store it in an airtight container in the refrigerator and reheat gently on the stovetop or in the microwave.
Q: What kind of chicken is best for Renee Paj?
Boneless, skinless chicken thighs are ideal for this recipe as they stay incredibly moist and tender throughout the cooking process. However, you can certainly use chicken breasts if you prefer, just be mindful of not overcooking them to prevent dryness.
Q: How spicy is the Renee Paj?
The spice level can be adjusted to your preference. The recipe as written provides a mild warmth. If you enjoy more heat, you can add more chili flakes or a pinch of cayenne pepper to the sauce. Conversely, reduce the amount of chili if you prefer a milder dish.
Renee Paj
A delicious and moist banana oat bread perfect for breakfast or a snack.
Ingredients
-
1 cup old fashioned oats
-
1 1/4 cups all purpose flour
-
1/2 cup light brown sugar, packed
-
1/2 tsp. kosher salt
-
1/2 tsp. baking soda
-
1/4 tsp. baking powder
-
1/2 tsp. ground cinnamon
-
3 large, ripe bananas, cut into chunks
-
2 large eggs
-
1 tsp. pure vanilla extract
-
3 TBSP cooking oil (corn, canola, etc)
-
1/3 cup chopped walnuts (optional)
Instructions
-
Step 1
Preheat oven to 350°F (175°C). Grease and flour a 9×5 inch loaf pan. -
Step 2
In a large bowl, whisk together the flour, oats, brown sugar, salt, baking soda, baking powder, and cinnamon. -
Step 3
In a separate bowl, mash the bananas. Add the eggs, vanilla extract, and cooking oil. Mix well. -
Step 4
Pour the wet ingredients into the dry ingredients and stir until just combined. Do not overmix. -
Step 5
If using, fold in the chopped walnuts. -
Step 6
Pour the batter into the prepared loaf pan and bake for 50-60 minutes, or until a toothpick inserted into the center comes out clean. -
Step 7
Let cool in the pan for 10 minutes before transferring to a wire rack to cool completely.
Important Information
Nutrition Facts (Per Serving)
It is important to consider this information as approximate and not to use it as definitive health advice.
Allergy Information
Please check ingredients for potential allergens and consult a health professional if in doubt.