Patriotic Oreo Balls-Easy No-Bake Dessert Fun
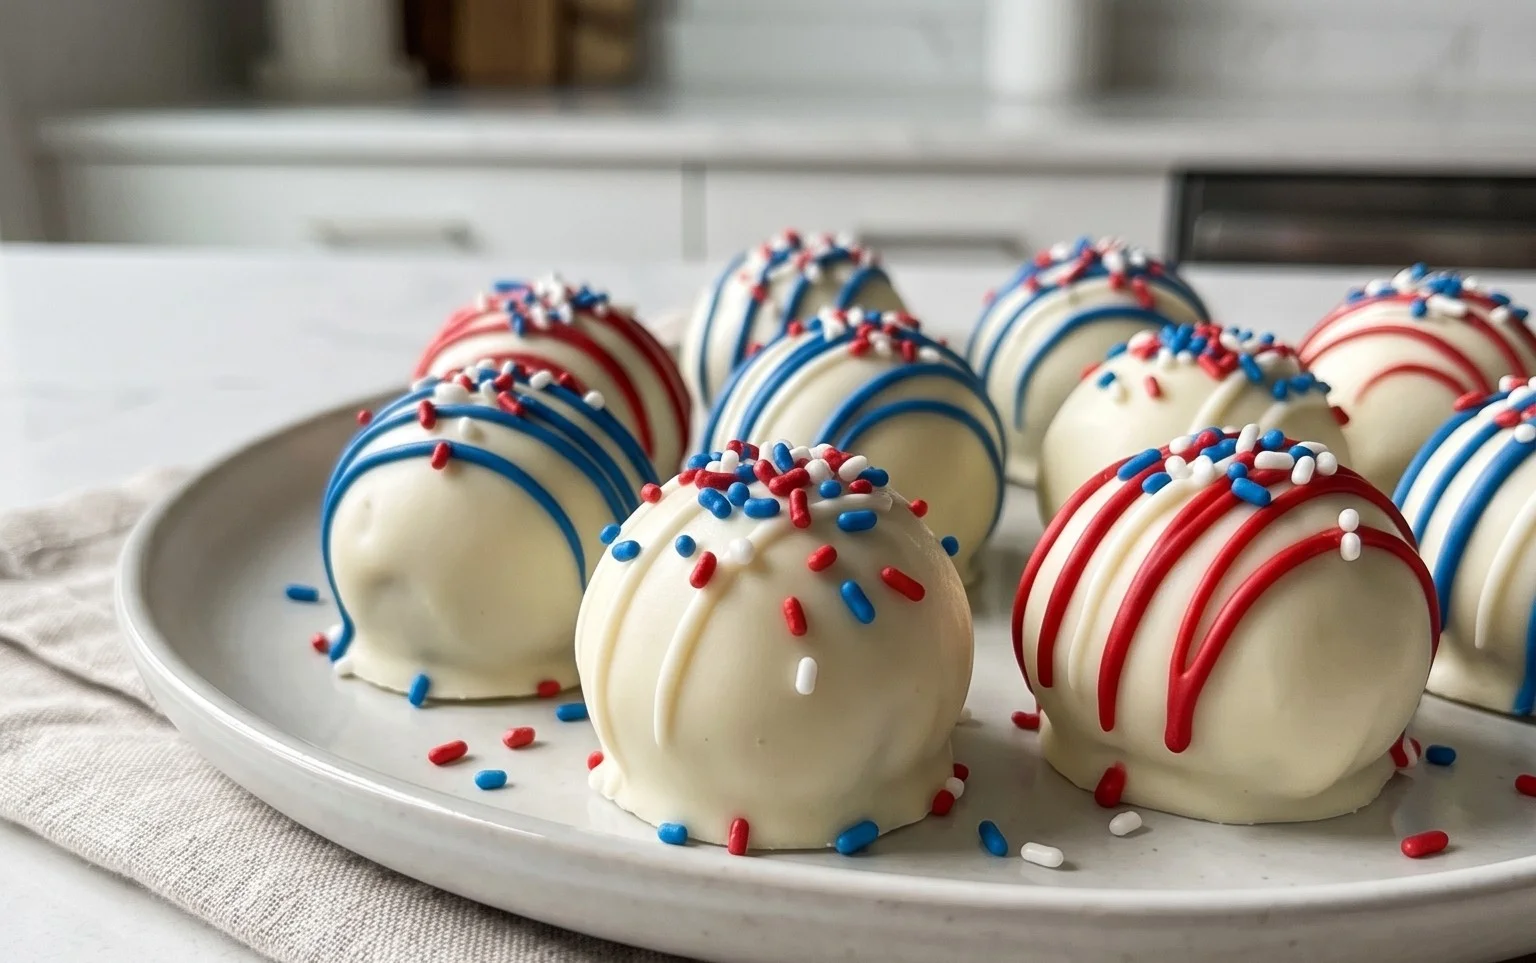
Patriotic Oreo Balls are more than just a sweet treat; they’re a burst of festive flavor and a surefire way to bring smiles to any celebration! Whether you’re gearing up for the Fourth of July, Memorial Day, or simply want to inject some red, white, and blue into your day, these delightful confections are the perfect answer. What’s not to love about the irresistible combination of crushed Oreos, creamy cheese, and a decadent chocolate coating? They’re incredibly easy to make, making them a fantastic activity to enjoy with family and friends, no matter your baking experience. The magic of Patriotic Oreo Balls lies in their customizable appearance. With a few simple additions of colored candy melts and sprinkles, you can transform them into vibrant, edible tributes to your favorite holidays. Get ready to wow your guests and indulge in a truly delicious and visually stunning dessert experience with these amazing Patriotic Oreo Balls!
Patriotic Oreo Balls
Looking for a festive and incredibly easy treat to impress at your next Fourth of July barbecue, Memorial Day picnic, or any red, white, and blue celebration? These Patriotic Oreo Balls are the answer! They’re a guaranteed crowd-pleaser, and the best part is, they require no baking whatsoever. Just a bit of crushing, mixing, and dipping, and you’ll have dazzling, delicious little bites that scream patriotism.
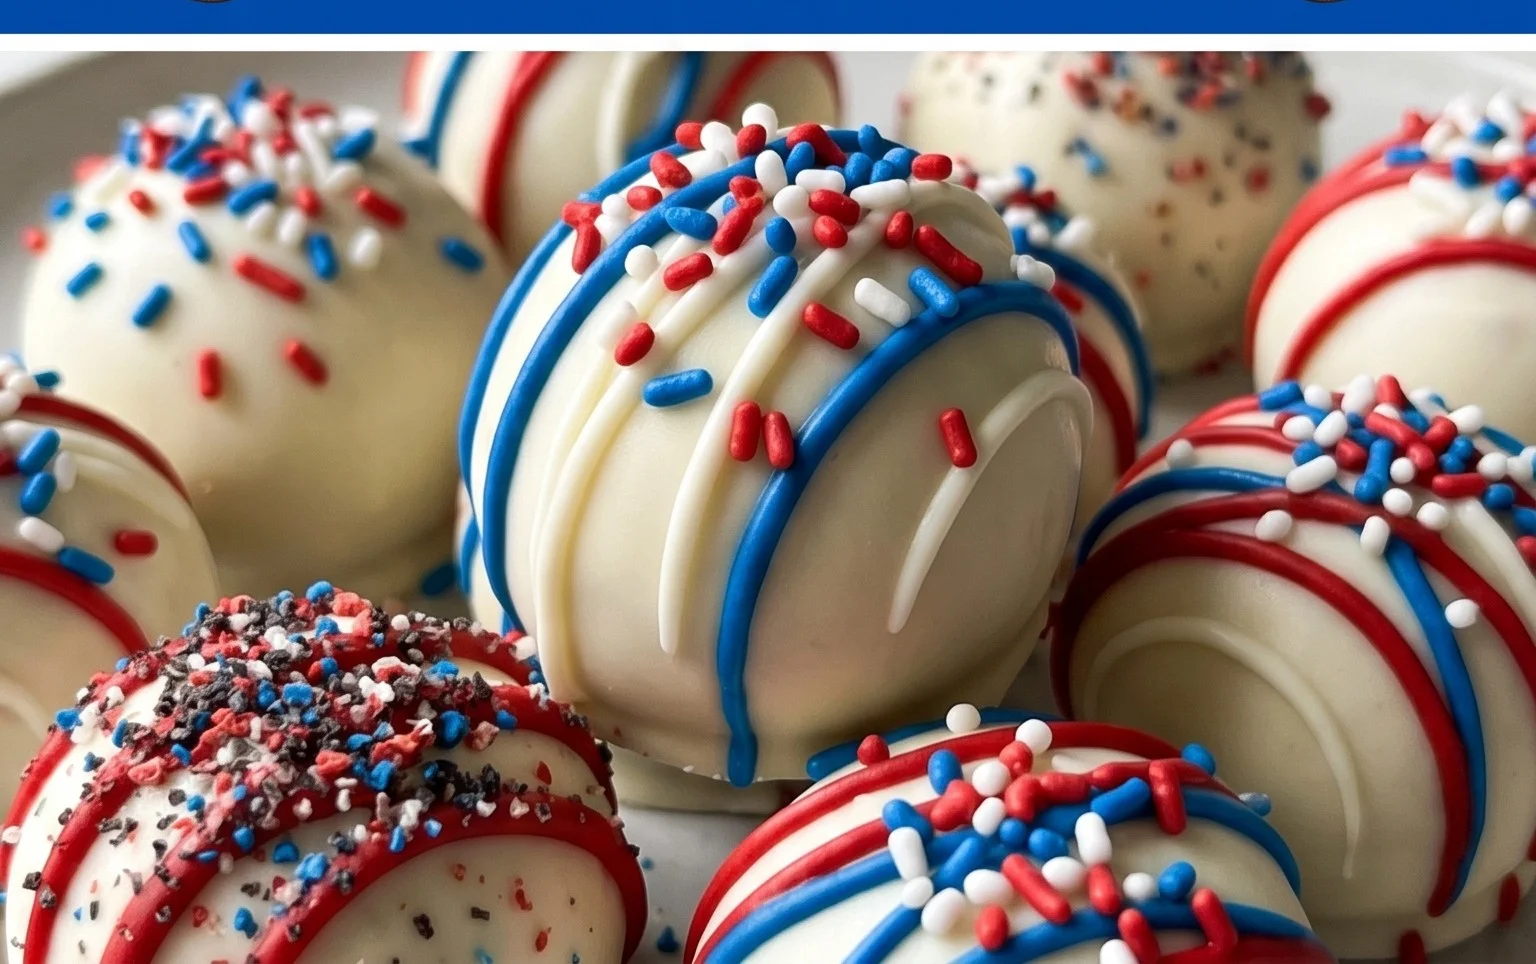
The magic of these Oreo Balls lies in their simplicity. We’re taking everyone’s favorite chocolate sandwich cookie and transforming it into a creamy, dreamy, no-bake confection. They’re perfect for little hands to help make (under supervision, of course!), and they look absolutely stunning when displayed. Imagin extracte a platter overflowing with these vibrant red, white, and blue delights, adorned with tiny white stars – it’s practically a dessert centerpiece! The combination of crushed Oreos and cream cheese creates a fudgy, rich texture that’s truly addictive. And with the candy melts, you can achieve a beautiful, glossy finish that makes them look as good as they taste. Get ready to wow your guests with minimal effort but maximum impact!
Ingredients:
Instructions:
First things first, let’s get those Oreos ready! You’ll need to crush the entire family-sized package of Oreo cookies into fine crum extractbs. The easiest way to do this is by using a food processor. If you don’t have one, no worries! You can also place the Oreos in a large resealable plastic bag, seal it tightly, and then go at it with a rolling pin until you have fine crum extractbs. The goal is to get rid of any large chunks so that your Oreo balls have a smooth texture. Don’t be shy; the finer the crum extractbs, the better your Oreo balls will hold together. Once you have your cookie crum extractbs, transfer them to a large mixing bowl.
Now, it’s time to bring in the creamy goodness. Make sure your 8-ounce block of cream cheese is softened to room temperature. This is crucial! If it’s too cold, it will be difficult to incorporate smoothly into the cookie crum extractbs, and you might end up with lumps. Add the softened cream cheese to the bowl with the Oreo crum extractbs. Using a sturdy spatula or your hands (the easiest and most effective method!), mix the cream cheese and cookie crum extractbs together until they are thoroughly combined and form a dough-like consistency. It should be moist enough to hold its shape when squeezed. This mixture is the base of our delicious Oreo balls, so ensure it’s well combined for the best texture.
Once your Oreo mixture is ready, it’s time to form the balls. Take about 1 tablespoon of the mixture at a time and roll it between the palms of your hands to form compact balls, about 1 inch in diameter. If the mixture seems too sticky, you can lightly dust your hands with a little extra crushed Oreo crum extractbs. If it seems too dry and crum extractbly, you might need to add a tiny bit more softened cream cheese (just a teaspoon at a time) and mix it in well. Aim for consistency across all your balls. Place the formed Oreo balls on a baking sheet lined with parchment paper. Once all the mixture is used, place the baking sheet in the freezer for about 15-20 minutes. This chilling step is very important as it will firm up the Oreo balls, making them much easier to dip in the candy melts without them falling apart.
While your Oreo balls are chilling, let’s get our dipping stations ready. You’ll be working with two colors: red and blue. In separate microwave-safe bowls, place the 12-ounce bag of red candy melts and the 12-ounce bag of blue candy melts. You’ll also need a separate small bowl for your Ghirardelli white melting wafers. Following the package directions for your specific candy melts, melt them in the microwave in 30-second intervals, stirring well after each interval, until they are completely smooth and creamy. For the white melting wafers, you’ll melt them similarly. It’s important not to overheat the candy melts, as they can seize up and become unusable. Once melted and smooth, set them aside, keeping them warm. You can place the bowls over a pan of warm water if needed, but avoid letting water get into the melts.
Now for the fun part: decorating! Take your chilled Oreo balls out of the freezer. Dip each ball into one of the melted candy melts – either red or blue – using a fork or a toothpick. Allow any excess candy melt to drip back into the bowl. If you’re using a toothpick, be careful as they can break. A dipping fork is often more robust. For a two-tone effect, you can dip half of the ball in one color and then, once that has set slightly, dip the other half in the contrasting color. Alternatively, you can drizzle melted candy of one color over a ball dipped in another. As soon as you have dipped a ball and it’s still wet, sprinkle it generously with the white star confetti sprinkles. This is your chance to get creative and make them truly festive! Once decorated, place the dipped Oreo balls back on the parchment-lined baking sheet. For the white chocolate drizzle, you can use a spoon or a piping bag with a thin tip to add decorative white lines over the red and blue dipped balls once the initial coating has set. Repeat this process until all your Oreo balls are dipped and decorated. Allow the candy melts to set completely at room temperature, or speed up the process by refrigerating them for a short period (about 10-15 minutes).
Conclusion:
There you have it! Crafting these delightful Patriotic Oreo Balls is a wonderfully simple yet incredibly rewarding way to add a burst of festive spirit to any occasion. They’re a guaranteed crowd-pleaser, perfect for barbecues, Fourth of July parties, or just a sweet treat to brighten your day. The irresistible combination of crushed Oreos and creamy goodness, all dipped in patriotic colors, makes them visually stunning and utterly delicious. Whether you’re a seasoned baker or a complete begin extractner, this recipe is designed for success, offering a fun and easy way to impress your friends and family.
I highly encourage you to give these Patriotic Oreo Balls a try! Don’t be afraid to experiment with the decorations – sprinkle them with edible glitter, add white chocolate drizzle, or even try different color combinations. They’re fantastic served alongside fresh fruit for a balanced dessert platter, or simply enjoyed on their own with a glass of cold milk. Get creative and make them your own!
Frequently Asked Questions:
Can I make these ahead of time?
Absolutely! Patriotic Oreo Balls store wonderfully in an airtight container in the refrigerator for up to a week. This makes them perfect for preparing in advance for your next celebration.
What’s the best way to store leftover Patriotic Oreo Balls?
For the best texture and flavor, store them in a single layer in an airtight container in the refrigerator. If stacking, place parchment paper between layers to prevent sticking.
Can I use different kinds of Oreos?
Yes! While classic Oreos are fantastic, feel free to get creative. Golden Oreos would work well for a different base flavor, or even mint Oreos for a refreshing twist. Just be mindful that the color of the cookie might slightly affect the final hue of your Oreo balls.
Patriotic Oreo Balls
Festive and easy-to-make Oreo balls decorated in red, white, and blue for a patriotic treat.
Ingredients
-
1 lb 2.12 oz Family Size package Oreo Cookies
-
8 ounce block cream cheese, softened
-
12 ounce bag red candy melts
-
12 ounce bag blue candy melts
-
⅓ cup Ghirardelli white melting wafers
-
White star confetti sprinkles
Instructions
-
Step 1
Crush the Oreo cookies into fine crumbs using a food processor or by placing them in a resealable bag and crushing with a rolling pin. -
Step 2
In a large bowl, combine the Oreo crumbs and softened cream cheese. Mix until well combined and forms a dough-like consistency. -
Step 3
Roll the mixture into small balls, about 1 inch in diameter. Place them on a parchment-lined baking sheet. -
Step 4
Melt the red candy melts and blue candy melts separately according to package directions. Melt the white melting wafers separately. -
Step 5
Dip half of the Oreo balls into the melted red candy melts and the other half into the melted blue candy melts. Let excess chocolate drip off. Place back on the parchment-lined baking sheet. -
Step 6
Drizzle the white melted wafers over the coated Oreo balls. Immediately sprinkle with white star confetti sprinkles before the coating sets. -
Step 7
Allow the candy coating to set completely. You can speed this up by placing the baking sheet in the refrigerator for about 10-15 minutes.
Important Information
Nutrition Facts (Per Serving)
It is important to consider this information as approximate and not to use it as definitive health advice.
Allergy Information
Please check ingredients for potential allergens and consult a health professional if in doubt.